• Photography
  • Interviews
  • Business
  • Reviews

Tiffinbox

Inspiring Photographers

  • Home
  • About
  • Blog
  • Contact

3 E-Books That Will Help You Master Lightroom, One Step At A Time

November 2, 2013 by Seshu | Editor & Publisher

All indications are you use either Photoshop or Lightroom. If you are editing one image at a time, they would both work, but I'll be you use Photoshop. But if being efficient is your goal, you will want to invest in Lightroom.

Like Photoshop, though, Lightroom is getting more and more complex to use. I have to admit I don't use all of its features, though I know I will be a whole lot more efficient if I did.

There are a few resources for you to learn how to use Lightroom to its fullest capacity:

Mastering Lightroom: The Library Module
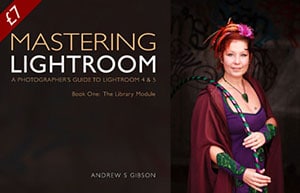
Mastering Lightroom Book One: The Library Module This is an e-book by fine art photographer and author Andrew Gibson. You can buy Mastering Lightroom: The Library Module from Andrew's website, or here at PhotoDough.com for the next few days for $7. Andrew is well-known for his concise writing and clear teaching style. Learn more about Mastering Lightroom here.

Lightroom 5 Unmasked

Lightroom 5 Unmaked by Piet Van den EyndeLightroom 5 Unmasked is an e-book by Piet Van den Eynde and distributed by Craft & Vision. It's 356 pages deep. If you are ready to go in for a deep dive, this might be the one you want to consider. If you are still using Lightroom 4, however, you may want to buy this e-book by Piet Van den Eynde instead. Also check out out other ebooks by Piet Van den Eynde here. Either version is $20 each. Both are well-researched, provide interesting case studies and are exquisitely designed with a wonderful array of visual examples.

Adobe Lightroom 5 The Missing FAQ
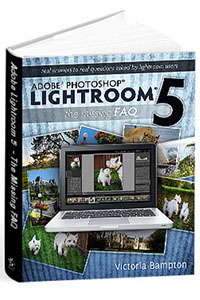
Adobe Lightroom 5 - The Missing FAQ - by Victoria Bampton This tome by Victoria Bampton, an Adobe Community Professional & Certified Expert for Lightroom, is very well regarded in the industry because Victoria constantly finds ways to upgrade it and make it better as Adobe tinkers with the program. If you have a question about Lightroom, this is the go-to-guide for you. It's about $50 for both the e-book and paperback versions. I would get both if I were you. Also, get a flavor of her writing through this free Lightroom 5 Quick Start Guide.

There are obviously other fantastic resources available for learning Lightroom, but I wanted to get these three resources in front of you as they are likely to appeal to someone who wants to get their feet wet in Lightroom quickly.

If you are one of them and you buy any of these e-books, would you please come back here and tell me what you thought of them? Thank you!

Filed Under: Home Middle Left, Photography, Web/Tech Tagged With: adobe lightroom, adobe photoshop, Andrew Gibson, Craft & Vision, E-books, Learning, Piet Van den Eynde, Victoria Bampton

3 Sizzlin’ Summer Specials From My Favorite Photographer Friends

July 25, 2013 by Seshu | Editor & Publisher

Some of my favorite photographer friends are having some time-limited special offerings that I felt I needed to share with you.

6-Week Photography Marketing BootcampWe all want to market our photography in a way that provides value to our clients and to us. That's called running a business. Some are assertive about it, while some others are passive. I believe you reap what you sow, but I also know frequency and consistency is key. One of the best products I've seen that teaches marketing for photographers is Jamie Swanson's e-book, 6-Week Photography Marketing Bootcamp. But this book is going away on Friday (yes, tomorrow). She is retiring it and rolling the information in the ebook into a new, more expensive course that should make its appearance in the Fall. But why wait until then? Get it now for only $49.

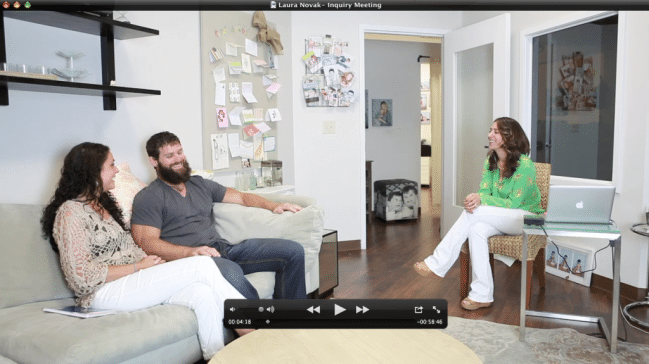
Laura Novak's Wedding Inquiry CourseEver wanted to see how a photographer consistently books wedding clients? Laura Novak's Wedding Inquiry Course just launched. Laura is not only a savvy business woman but she is a versatile photographer whom I respect a great deal. Now through July 31st, get 25% off her new course (use: “JULYINTRO”) that takes you literally by the hand to show you how she books wedding clients. She had a video crew record her interactions with a real wedding couple. No actors were involved!

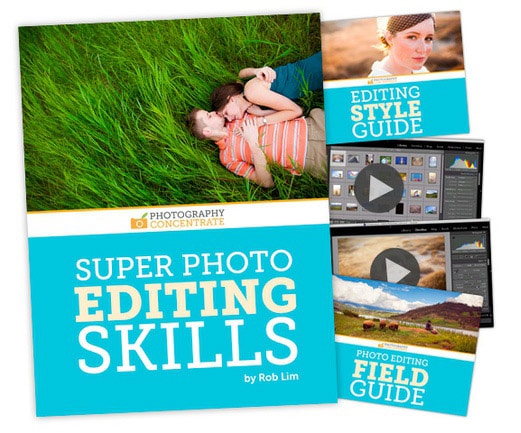
Super Photo Editing Skills By Photography ConcentrateLastly, my friends Rob & Lauren Lim of The Photography Concentrate have relaunched their terrific tutorial, Super Photo Editing Skills, with new videos that address the new features in Lightroom 5. This is the one course I keep recommending to all my friends because it is so comprehensive, but not overwhelming. Plus you get a ton of bonuses like a style guide and presets that you can deploy right away. Super Photo Editing Skills is usually $79, but starting today through August 2nd, it will be $55. Ever wanted to learn how to edit your images in Lightroom? This is your ticket! Get it punched.

Full disclosure: I carefully pick the very best products and services for you. All are affiliate links that help support this site. So do the right thing!

Filed Under: Photography, Sales Tagged With: Education, Jamie Swanson, Laura Novak, lauren lim, Learning, Photography, photography concentrate, rob lim, skills, Specials, summer, Teaching, The Modern Tog, Tutorials

The Mother of All Mentoring

September 24, 2012 by Seshu | Editor & Publisher

Emily Potts at Moms With Cameras is launching a brand-new online workshop, The Mother of All Mentoring. The workshop runs from October 23-November 13 and usually costs $379. Class is limited to only 50 participants. So please be sure to register early to reserve your seat!

Mother Of All Mentoring Online Workshop

She says the workshop is a comprehensive program designed to help you build an incredible photography business starting from where you are this very moment. Emily believes in teaching easy-to-implement strategies that allow you build the photography business of your dreams.

The Mother of all Mentoring is a series of four lessons that run over the course of four weeks. Each week you will receive a 90-minute recording plus a series of tasks that will give you both the education and the tools you need to run a successful photography business.

Registration opens on Wednesday September 26, 2012, but you have an opportunity to win a spot before you can buy it! She’s given Tiffinbox a complimentary seat to give to one lucky reader! Here’s how to enter:

1. Like Tiffinbox on Facebook and Follow Tiffinbox on Twitter.

2. Like Moms With Cameras on Facebook and Follow Moms With Cameras on Twitter.

3. Leave a comment below.

4. We will announce our winner on September 25th, 9 pm EST.

Good luck everyone!

If you’re not the lucky winner, don’t fret. Emily is also offering all of our followers $100 off of the tuition price when they use the code MM100 by September 30th, 2012.

As an added bonus, the first twenty-five registrants will receive a thirty-minute phone consultation with Emily Potts!

With your enrollment, you’ll receive the following:

Four 90-minute sessions full of information on that week’s topics.

A weekly pdf outlining your goals for the week and offering spaces on which to take notes to refer back to.

A set of digital templates to use for your promotional materials and products.

In-house forms to streamline your workflow and keep track of clients.

Special offers and promotions from our favorite vendors.

While this course is being offered by Moms With Cameras, I am sure Emily would welcome guys into this online mentoring program as well. So, if you are looking to get a solid footing as you set up your business, this online mentoring program might be your ticket.

[Just so you know, I am not financially benefitting by announcing this opportunity here on my site.]

Filed Under: Contests & Grants, Photography Tagged With: all mentoring, emily potts, Learning, mentor, mentorship, moms with cameras, online mentoring, online workshops

Oh $&!#: Our Biggest Business Mistake

January 13, 2012 by Lauren Lim

This guest post is by Rob & Lauren, who are photographers, educators, travelers, and all-around fun-loving folks. They spend their time teaching on Photography Concentrate and creating portraits of fun people. They are currently obsessed with espresso and robots. Follow them on Twitter.

Vancouver Seagull | © Robert Lim

Once upon a time we made a really big mistake in our business. The kind of mistake that still comes back to haunt us on a regular basis. A real forehead-slapping, bad-word-saying, doozy of a blunder. 

But before we tell you what we did, let's take a second to talk about mistakes. 

We're human. So are you. (Unless you're a robot, and then you don't really need to read this.) Human beings make mistakes. All. The. Time. If you haven't made a big mistake in your business yet, chances are pretty good that you will.
 
And so a big part of being a business owner is getting your mind in the right place to handle the inevitable missteps. Here are a few steps to take care of those problems when they pop up:

Step 1: Understand that you will make mistakes.
 
You're not perfect and mistakes will happen. When you accept that, you'll feel a lot less anxious and worried! You may even come to embrace mistakes when they happen! Maybe…

Step 2: Admit the mistake.
 
This is a big one. It's easy to hide from your mistakes, and pretend nothing is wrong. Bad move. They have a way of getting worse over time, and you lose your ability to nip the problem in the bud. So when you make a mistake, acknowledge it. Write it down to make it real if you have to. Just admit you messed up, and you'll be in a much better place to fix it.

Step 3: Look at the mistake objectively.
 
When it's your business it's easy to get emotional, and think the mistake is much more dire than it really is. Take a step back, get some big picture perspective, and figure out just what went wrong. Be honest.

Step 4: Fix it. 

This might not always be easy, but do your best to figure out how to fix the mistake. Make things right with clients, with your business, and with yourself. Every mistake is different, so there's no single answer to this one. But now that you've admitted the mistake, and looked at it objectively, you should be able to figure out how to fix it.

Step 5: Learn from it. 

After you've worked to fix the mistake, now comes the most important part. Learn from it!! This is the silver lining, and the big reason why it's ok to make mistakes. They are amazing learning experiences in disguise. If you figure out how to prevent the mistake in the future, you end up growing as a result of making it in the first place. Win!

Step 6: Move on. 

Remember, it's ok to make mistakes. After you've learned from it, then move on. Dwelling on mistakes you've made doesn't help you at all. Focus your energy instead on doing great things in the future. You can't change the past, after all! (Unless you have a time machine, and if so we should talk.)

So, now are you ready to hear about our big mistake? Let's do it.

After a couple of years of shooting weddings in our hometown of Edmonton, we thought it would be a great adventure to move to another city (Vancouver) and set up shop. We went out there to look around, and even did a bunch of networking with local photographers. 

Then, the big mistake: we announced that we would be moving on our blog. 

And never moved.

But all of our clients and potential clients thought we weren't going to be in Edmonton anymore. They stopped contacting us, referring us, telling people we weren't shooting here anymore…you can see why this was a big mistake. 

When we decided to stay in Edmonton we did post about it, and sent out a newsletter, but we never really admitted just how big the mistake we made was. We didn't take the “fix it” stage seriously enough. We didn't put in enough effort to make sure everyone knew we were staying.

And so fast forward a few years, and we still regularly get asked when we are moving, or hear statements like “Oh you're still here! I thought you had moved!”. Bummer.

Luckily it didn't send our business down the toilet, but that was a very real possibility. We've now learned to never make big announcements online unless we are absolutely, positively, 100% sure about it. 

So, have you made a big mistake? Did you admit it and fix it? Or ignore it and have it grow into a big issue like ours? What did you learn from your boo boo? Share with us in the comments now!

Need to learn how to use your camera, edit images in Lightroom, design wedding albums in InDesign? Robert & Lauren Lim are passionate about teaching you through their website and products. Buy them here using these affiliate links so that you may support Tiffinbox as well.

Filed Under: Business, Photography Tagged With: Business, error, knowledge, lauren lim, Learning, mistake, photography concentrate, rob lim, Teaching

3 Main Reasons For Using Lighting Diagrams

August 5, 2011 by Olivier Lance

This guest post is by Olivier Lance, who with Pierre-Jean Quilleré launched Sylights in 2009, a wonderful web and mobile application for photographers that helps them document their lighting setups. Olivier, a full time IT engineer from Paris, France, develops MacOS X software for a living. He's also a passionate photographer. Please follow Olivier on Twitter.

Every now and then, when you post a photo to your blog or on a sharing platform, you get the common question: “how did you light it?”

That's a tricky one! How do you go explaining to somebody a full setup of light modifiers, gobos, flash settings, angles, etc.?

The short answer is: lighting diagrams.

Lighting Diagram

Not everyone needs a lighting diagram to understand the lights behind a photography; experienced photographers can usually tell by looking at the shadows’ softness or shapes or at the catch light.

However, I'm not one of them. At least, not yet! So what do lighting diagrams have that can help me? Let's state the obvious first: lighting diagrams show the gear used to light a scene and how many lights were used. They show where the lights were set and how they were directed, relative to the subject.

“Relativity” is an important notion here. I think it's the key when working with lights. What I really see when I look at a lighting diagram is not “where” the main light is, but “how far” it is from the subject. And “how farther” (or closer, larger, etc.) the fill light has to be to do its job just as I see it in the resulting photo.

The same principle applies to flash power. This is a second set of information that's usually provided on or along with lighting diagrams. To correctly reproduce lighting, one has to know how powerful each light was. But it's really “the relationship between the different light levels that is important”, David Hobby tells us in his article Strobe/Ambient balance: A Shorthand Way of Thinking.

See, we're not used to describing amounts of light in an absolute manner. You'd rather say “this room is dark” – referring to what we usually consider a properly lit room – than “wow, it's barely 150 lux in here!”. Both are indicating a light level, but the former is relative whereas the latter is absolute. So a good lighting diagram could just use the main light as a reference and then say “this light is +1/3 of a stop, this other one -1 stop”.

That's why a lighting diagram is such a wonderful document to any photograph. No matter the kind of flash I use and no matter how powerful they are. By using that basic information – relative distances, angles, relative light levels – I can reproduce the lighting over and over again.

That's the main reason I see why photographers should use lighting diagrams: memory. Some photos are easy enough to remember; a lighting diagram will ensure the others are as easily reproducible. Besides the memory perspective, a document as complete as a lighting diagram is also a great way to share your knowledge … but more on that in a minute.

Another very simple reason is that “a picture is worth a thousand words.” If you’re working with one or several assistants, you’d rather be drawing what you have in mind than explaining it at great length several times! This leads me to the second main reason I think photographers should get used to lighting diagrams: teaching. There are so many people learning artificial lighting nowadays: amateur photographers, photography students and pros as well, who want to improve their technique.? To any of them, lighting diagrams are an incredible educational tool! By putting together a photo and its diagram, one can understand the role and effects of each light in a setup. So if you document your photos by using lighting diagrams, you can actually teach other photographers your lighting techniques and help them figure out very easily how you lit your shoots. Diagrams are also a perfect way to keep track of the setups that worked while testing and learning.

Brownie Camera Lighting Diagram

Finally, lighting diagrams allow any photographer to prepare a shoot beforehand. Just as I’m using a draft paper to prepare this post, a lighting diagram can easily be drawn to throw ideas, get the ball rolling and have some setups ready before a session. This is the third advantage of lighting diagrams: planning. You can of course use any other technique to prepare a shoot, but the completeness of a lighting diagram and its close representation of a real setup makes it a good choice to start with, before you can actually try your setups and make arrangements.

So, why should you use lighting diagrams as a photographer? Because it’s a great way to prepare your sessions, to document your photos afterwards and to keep track of your lighting setups as well as to share them with others and to teach beginners your techniques.

All those reasons pushed me to create Sylights, a service to photographers I launched a year ago with my friend Pierre-Jean Quilleré. Our idea is to make lighting diagrams easy to use and to base a complete sharing platform on them. Sylights’ goal is to accompany every photographers on their learning path and to store their lighting diagrams for them. We already offer a large range of tools for that purpose: an online diagram editor with a lighting diagram gallery accessible to anyone, an iPhone and an iPad app for when you’re on the go. Many features revolve around those three apps.

We’re still evolving and will gladly accept all your feedback to help us answer those three needs: memory, teaching and planning.

We’d also like to know: how do you use lighting diagrams, and why?

Food Photography Lighting Diagram

Filed Under: Lighting, Photography Tagged With: create light, diagrams, Learning, light diagram, light levels, Lighting, lighting techniques, memory, photographer, Photography, planning, setup, Teaching, used lighting

  • « Previous Page
  • 1
  • 2
  • 3
  • Next Page »

Subscribe To Tiffibox Treats!

Looking for a well-curated email newsletter that will leave you inspired and motivated about your photography business? Sign up below!

About Seshu

Seshu creates relaxed portraits of families and high school seniors in Avon, Connecticut. He also leads a successful headshot photography studio in Connecticut, helping professionals from a variety of disciplines project the very best versions of themselves. He created Tiffinbox as a way of inspiring photographers, to create better images and successful businesses. [Read More]

Email Templates For Headshot Photographers

Email Templates for Headshot Photographers

Recent Posts

  • How Capture One Changed My Event Photography
  • 10 Steps To Stay Positive In Times Of Great Stress
  • Why You Need To Read “Personal Branding For Photographers” Now
  • How To Master Your Website Content Step By Step?
  • Tony Taafe’s TNT Method For Headshot Photographers

Recent Comments

  • Stephen Davison on Are You A Business Owner Who Is Smart, But Stuck?
  • Ben A. on Don Giannatti Clinches The 8th Annual Tiffinbox Award
  • Dan on Don Giannatti Clinches The 8th Annual Tiffinbox Award
  • Donald Giannatti on Don Giannatti Clinches The 8th Annual Tiffinbox Award
  • Stephen Davison on G.E. Masana’s 6 Strategies For Wedding Photography Success
  • Naveen Kumar on Weddings In India Are More Than Being At The Right Place And At The Right Time
  • kartick on Weddings In India Are More Than Being At The Right Place And At The Right Time
  • Leonid Farbman on 6 Uncommon Trends To Grow Your Photography Business
  • Willow and Finch Wedding Photography on 11 Reception Tips To Help Your Wedding Photography
  • Web Designer Malaysia on How To Optimize Your Squarespace Website For Search Engines
  • Creastan on An Interview With Photojournalist G.M.B. Akash
  • Cindy Brown | Atlanta on An Open Letter To A Local Photographer

Become a Patron!

Copyright © 2026 · Tiffinbox · Site Design by Heather Mackan Creative · Built on Genesis