• Photography
  • Interviews
  • Business
  • Reviews

Tiffinbox

Inspiring Photographers

  • Home
  • About
  • Blog
  • Contact

Are You Really A Professional Photographer?

November 16, 2011 by Andy Bondurant

Some of you may recall Andy Bondurant's steamy blog post from almost a year ago called “What's Too Sexy For High School Seniors?“. Well he is back, with more advice for photographers. He is the co-founder and director of Senior Portrait Artists. You can find him on Twitter and Facebook.

I recently ran across a question on the question/answer/information site Quora. Here was the question, “How can I dress like a professional photographer?”

I can hear some of the responses some of you have come up with already. “Great, another amateur, jumping into photography taking more of my clients.” But wait just a minute more, because what I found truly disturbing was the first response.

You can visit the site for the full response, but here is the first line:

“This is an awesome question. In my experience shooting events, it's less important how you dress and more important how your equipment looks.”

What?

The right equipment for the right job can make a huge difference in getting the shot you want and need. By no means does it make you a professional. In fact, it may put you out of business quicker than anything else you could do. Professional equipment is expensive, and much of it is not necessary to begin a business.

Over the past 8-10 years, I've had the blessing of having multiple opportunities each year to watch great, professional portrait photographers work on location shoots. Most of the time they have exactly what they need, when they need it. However,many times I would hear things like, “Oh, I wish I had …” Then they move on to get a great shot without the piece of equipment they just mentioned.

So what is that makes GREAT photographers GREAT? It's not the equipment, and it goes beyond just training. Here are 3 qualities I've found seems to be similar among photographers who are professional.

1. Relationship.

The best photographers seem to be able to connect with their clients quickly and efficiently. If you want to get images that truly portray a subject's personality you need that person to trust you. You need them to believe you are going to make them look incredible.

If the client doesn't trust you it shows in their eyes. It shows in their body posture.

Personality is not necessarily the biggest factor in this either. Having a fun, outgoing personality helps, but I've seen more reserved photographers do just as well as larger than life photographers.

The key to building relationship is caring. Building trust means truly and genuinely caring for the client and how they look and feel.

2. Time.

Above, I mentioned greatness is more than equipment or training. Having the right equipment and training only take you so far. Having the right equipment without enough time using it will result in sub-par images. Having the correct training without time to practice and perfect that training will lead to a less than perfect product.

Malcolm Gladwell in his book Outliers calls this the 10,000 hour rule. His premise is anyone who excels in their field has spent 10,000+ hours perfecting it before they become “known” for their skill. He references The Beatles, Bill Gates and others who fit this theory.

There is no substitute for time in photography. The more time you spend shooting, editing and perfecting, the better photographer you will be.

3. Consistency.

John Pyle wrote an article for The Collective arguing that this one point is what truly makes a professional photographer professional.

The ability to get a great shot no matter the circumstances, time of day, or the not having the “right” equipment is what sets the pro apart from the amateur.

Consistency is directly related to #2. The more time you have doing photography the more consistent product you will create.

Let me wrap up by telling you one more thing.

I'm not a photographer. Before you completely forget what I've written based on that statement, think about this: Each one of the above points (relationship, time, consistency) applies to any profession.

I don't care if you are a doctor, lawyer, lock-smith, banker or pizza maker all 3 of these qualities will be found in the great ones. It will have nothing to do with the equipment they do or don't have.

It will be about creating relationships, having time invested in their profession, and consistently giving great service and/or creating a great product.

What do you think? Is Andy right on the money about this? Discuss below!
Filed Under: Business, Photography Tagged With: andy bondurant, consistency, factors, photographer, Photography, professional, professional equipment, professional photographer, professional photographers, professional portrait photographer, relationship, senior portraits, visual arts, visual journalism, Wedding Photography

Allen Murabayashi, CEO Of PhotoShelter On Photography & The Photo Industry

October 17, 2011 by Seshu | Editor & Publisher

For editorial photographers, looking to archive and sell or license their images, PhotoShelter offers a solution that is hard to pass up.

I caught up with Allen Murabayashi, the company's CEO last week and spoke to him briefly about the state of the photography industry, what we can expect to see out of PhotoShelter in the coming years and why those meaty guide books the company publishes helps to educate photographers about the current marketing trends.

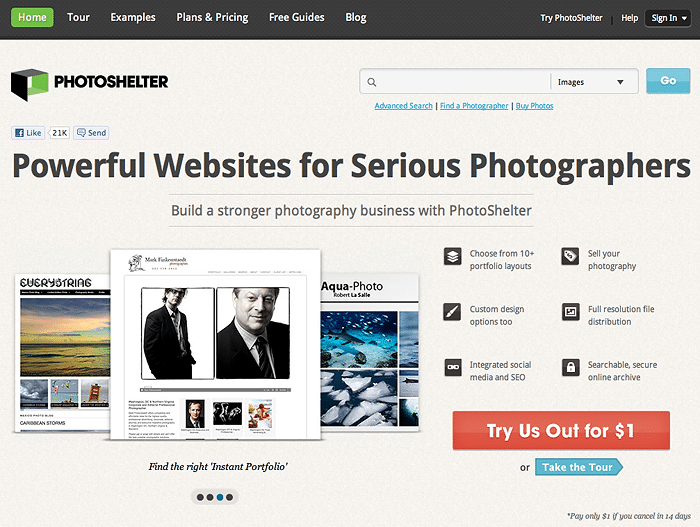
PhotoShelter Home Page

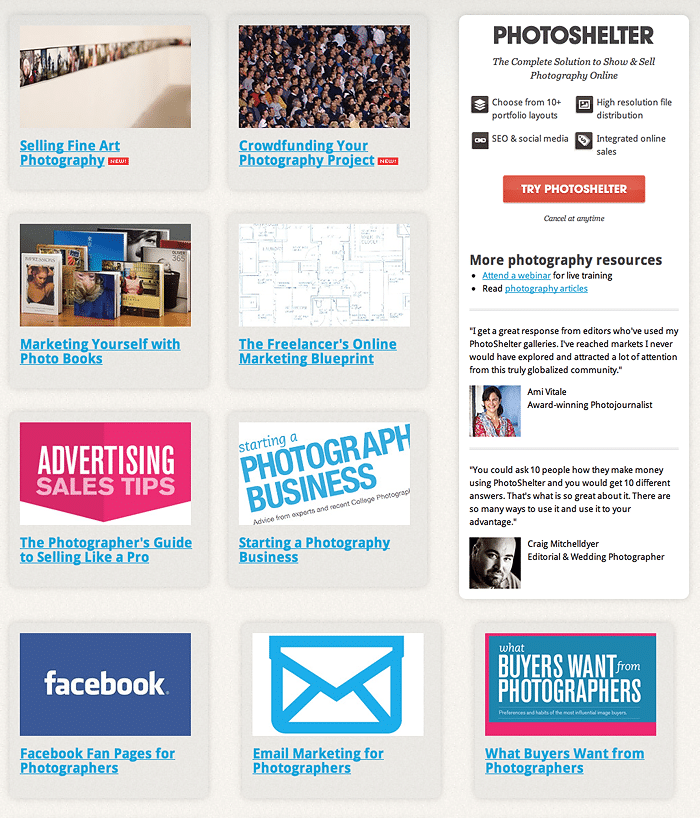
The complimentary guides help you grow your photography business:

PhotoShelter Free Guide Books

PhotoShelter is offering all Tiffinbox readers the following discount when you sign up for PhotoShelter before midnight on October 31st. When your readers sign up at www.photoshelter.com, they can enter the promotion code TIFFINBOX1110. The code entitles readers to the following discounts:

1) Annual Standard Account for $305.00/year – a $55 savings versus a monthly plan.
2) Annual Pro Account $529.00/year – a $70 savings versus a monthly plan

I am told that as of today, all new and existing standard accounts will receive 60 GB of secure storage (it used to be only 35gb), providing all standard accounts a safe space to store thousands of extra files. This increase comes at no additional cost.

Now that you have watched the video, can I ask a favor of you? Post a comment below & tell your friends. You have a variety of options below to spread the word. Thank you!

Filed Under: Business, Photography Tagged With: allen murabayashi, books, editorial photographer, editorial photographers, educational, guide books, Industry, photo, photo industry, photographer, Photography, photography industry, photoshelter, video interview, visual arts

Keep It Simple Photo Workflow

August 15, 2011 by Seshu | Editor & Publisher

I've described my photography workflow before. At its core is the belief that by keeping things simple, my workflow will cut short the time I spend in front of the computer and allow me to return to making images or spending more time with my family.

Fortunately, I am not alone in this line of thinking. Paul Gero, a friend and fellow photographer based in Orange County, California has published a lucid, step-by-step guide for a vast majority of photographers who have no clue about post production or who are frazzled by all the tools and options presented to them. The guide book is called Simple Photo Workflow.

Paul Gero's Simple Photo Workflow

With over 20 years of experience as a photographer – first at newspapers and then documenting weddings and portraits – Gero is one photographer whose words and work I trust. You may recall his excellent guest blog post on Tiffinbox – Control & Chaos: Two Genres of Photography.

Now, go on check his blog out. It's a source of weekly inspiration for me. Set aside for a moment the way Gero expresses the light and life he sees in front of him. I think he is a master at photographing the unguarded moment. However, take another look at the way the images are processed.

To my eyes, there is nothing complicated about them, yet they are brilliant. I see natural skin tones, just the right amount of grain, light vignetting that draws your eyes to the main subject of the frame and the black & white images that have both depth and drama to them. With Photoshop and other image processing tools, it's much too easy to go crazy and drop layer after layer of actions, until your vision of the final image is not only blurred, it's obliterated.

Getting back to saving time, the post production work Gero introduces us to in his new e-book, is simple, yet elegant. It won't stress you or your computer out. Gero expresses his thoughts simply as well. Chapters on exposure, editing, raw processing, using Lightroom and photo finishing (retouching) are all punctuated with exceptional examples and step-by-step instructions, so you'll never falter. As a bonus, Gero has a “cheat-sheet” at the end of the book that walks you through all of the processes he goes through when he is editing his own images! This is like looking over his shoulder and watching him work, except you'll be doing it yourself and learning from it.

If you already use Photomechanic, Lightroom and Photoshop and use them well, then this ebook isn't for you. However, if you do use these programs in your post-production work and you are just stumbling along, I urge you to . Yes, I called it an ebook before, but it's much more than that. You'll want to print it out (as I have) and use it as you edit your images. Once your post production become intuitive, then you can go in and customize the system.

Full disclosure – I received a complimentary copy of the ebook to review but I am not an affiliate and I do not make a dime off of the sale of this wonderful book. I am recommending it here solely on its merit.

Want your own copy? Use “seshu” between today and August 29 to buy it for $47 (regular price is $77). I am sure you want to save $30.

Filed Under: Photography Workflow Tagged With: adobe photoshop, adobe photoshop lightroom, computer graphics, graphics software, guide books, images, keep it simple, orange county, paul gero, photo manipulation, photographer, Photography, process imaging, simple photos, vignetting, Workflow

3 Main Reasons For Using Lighting Diagrams

August 5, 2011 by Olivier Lance

This guest post is by Olivier Lance, who with Pierre-Jean Quilleré launched Sylights in 2009, a wonderful web and mobile application for photographers that helps them document their lighting setups. Olivier, a full time IT engineer from Paris, France, develops MacOS X software for a living. He's also a passionate photographer. Please follow Olivier on Twitter.

Every now and then, when you post a photo to your blog or on a sharing platform, you get the common question: “how did you light it?”

That's a tricky one! How do you go explaining to somebody a full setup of light modifiers, gobos, flash settings, angles, etc.?

The short answer is: lighting diagrams.

Lighting Diagram

Not everyone needs a lighting diagram to understand the lights behind a photography; experienced photographers can usually tell by looking at the shadows’ softness or shapes or at the catch light.

However, I'm not one of them. At least, not yet! So what do lighting diagrams have that can help me? Let's state the obvious first: lighting diagrams show the gear used to light a scene and how many lights were used. They show where the lights were set and how they were directed, relative to the subject.

“Relativity” is an important notion here. I think it's the key when working with lights. What I really see when I look at a lighting diagram is not “where” the main light is, but “how far” it is from the subject. And “how farther” (or closer, larger, etc.) the fill light has to be to do its job just as I see it in the resulting photo.

The same principle applies to flash power. This is a second set of information that's usually provided on or along with lighting diagrams. To correctly reproduce lighting, one has to know how powerful each light was. But it's really “the relationship between the different light levels that is important”, David Hobby tells us in his article Strobe/Ambient balance: A Shorthand Way of Thinking.

See, we're not used to describing amounts of light in an absolute manner. You'd rather say “this room is dark” – referring to what we usually consider a properly lit room – than “wow, it's barely 150 lux in here!”. Both are indicating a light level, but the former is relative whereas the latter is absolute. So a good lighting diagram could just use the main light as a reference and then say “this light is +1/3 of a stop, this other one -1 stop”.

That's why a lighting diagram is such a wonderful document to any photograph. No matter the kind of flash I use and no matter how powerful they are. By using that basic information – relative distances, angles, relative light levels – I can reproduce the lighting over and over again.

That's the main reason I see why photographers should use lighting diagrams: memory. Some photos are easy enough to remember; a lighting diagram will ensure the others are as easily reproducible. Besides the memory perspective, a document as complete as a lighting diagram is also a great way to share your knowledge … but more on that in a minute.

Another very simple reason is that “a picture is worth a thousand words.” If you’re working with one or several assistants, you’d rather be drawing what you have in mind than explaining it at great length several times! This leads me to the second main reason I think photographers should get used to lighting diagrams: teaching. There are so many people learning artificial lighting nowadays: amateur photographers, photography students and pros as well, who want to improve their technique.? To any of them, lighting diagrams are an incredible educational tool! By putting together a photo and its diagram, one can understand the role and effects of each light in a setup. So if you document your photos by using lighting diagrams, you can actually teach other photographers your lighting techniques and help them figure out very easily how you lit your shoots. Diagrams are also a perfect way to keep track of the setups that worked while testing and learning.

Brownie Camera Lighting Diagram

Finally, lighting diagrams allow any photographer to prepare a shoot beforehand. Just as I’m using a draft paper to prepare this post, a lighting diagram can easily be drawn to throw ideas, get the ball rolling and have some setups ready before a session. This is the third advantage of lighting diagrams: planning. You can of course use any other technique to prepare a shoot, but the completeness of a lighting diagram and its close representation of a real setup makes it a good choice to start with, before you can actually try your setups and make arrangements.

So, why should you use lighting diagrams as a photographer? Because it’s a great way to prepare your sessions, to document your photos afterwards and to keep track of your lighting setups as well as to share them with others and to teach beginners your techniques.

All those reasons pushed me to create Sylights, a service to photographers I launched a year ago with my friend Pierre-Jean Quilleré. Our idea is to make lighting diagrams easy to use and to base a complete sharing platform on them. Sylights’ goal is to accompany every photographers on their learning path and to store their lighting diagrams for them. We already offer a large range of tools for that purpose: an online diagram editor with a lighting diagram gallery accessible to anyone, an iPhone and an iPad app for when you’re on the go. Many features revolve around those three apps.

We’re still evolving and will gladly accept all your feedback to help us answer those three needs: memory, teaching and planning.

We’d also like to know: how do you use lighting diagrams, and why?

Food Photography Lighting Diagram

Filed Under: Lighting, Photography Tagged With: create light, diagrams, Learning, light diagram, light levels, Lighting, lighting techniques, memory, photographer, Photography, planning, setup, Teaching, used lighting

Portable Power Options For Photographers

July 29, 2011 by Seshu | Editor & Publisher

Yesterday, Tony Urban talked about off-camera lighting on location. If you are photographing early in the morning or later in the day, it's much easier to use your smaller Speedlites for the kind of results Tony produces for his clients.

But when you aren't so lucky about picking the time of day and your stuck having to fight that big fiery ball in the sky called the Sun, you are going to need something more powerful, like a studio strobe. Check out how Justin Van Leeuwen does it with an Elinchrom Quadra System.

I recently bought a few used Elinchrom monoblocs for the expressed purpose of using them outside, in the sun and to over power it. That's all well and good, but I was left wondering about how I would power it in the field.

Paul C. Buff's Vagabond IIWell, I initially bought the Paul C. Buff Vagabond II, now being discontinued. It is one very heavy option and I tell you I didn't use it much at all because it was such a pain to lug around. Photographer Blair Phillips has come up with an interesting way to carry it around, so if you have a Vagabond II, you should check the LR-02 Light Rover.

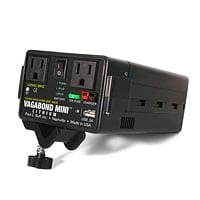
Paul C. Buff's Vagabond MiniI sold my Vagabond II unit and for some time I did not have another option. But the folks at Paul C. Buff came out with the much lighter Vagabond Mini. The wait to get one of those units, when I ordered them, was 2 to 3 weeks. That may not be the case anymore. At $240, it was a no brainer. Plus, Rob Galbraith's review of the Vagabond Mini convinced me that this was the unit to buy for what I wanted to do. Knowing its capabilities, I am not one to expect a faster recycle time than 3 or 3 1/2 seconds at full pop. So, I just shoot accordingly.

But there are clearly other options out there. Cris Mitchell of ProPhotoResource suggested that I look at Innovatronix Explorer XT as an alternative to the Vagabond II. It too is solidly built and has rave reviews from its legions of fans.

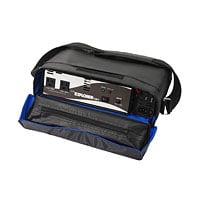
Tronix Explorer MiniToday, I received an email about Tronix Explorer Mini. And here, according to the company, are the top reasons for buying it. Check out the video below that shows you how quickly the unit recycles. While it calls itself a “mini” it is only so relative to its big brother the Tronix Explorer XT3 (coming soon).

I wonder if Rob Galbraith will get his hands on this unit so that he could compare it with the Vagabond Mini. I sure hope so! If you consider yourself handy with tools and gadgets and like to put things together, take a look at this Instructables tutorial to create a portable power box for photographers.

Which option would go for and why? Tell us in the comments. If you found this post useful, please share it with your tribe using the social media icons you see directly below this post. Thank you!

Filed Under: Lighting, Photography Tagged With: photographer, Photographers, portable power, studio strobes, the field, Tronix Explorer Mini, Vagabond Mini

  • « Previous Page
  • 1
  • …
  • 7
  • 8
  • 9
  • 10
  • 11
  • …
  • 18
  • Next Page »

Subscribe To Tiffibox Treats!

Looking for a well-curated email newsletter that will leave you inspired and motivated about your photography business? Sign up below!

About Seshu

Seshu creates relaxed portraits of families and high school seniors in Avon, Connecticut. He also leads a successful headshot photography studio in Connecticut, helping professionals from a variety of disciplines project the very best versions of themselves. He created Tiffinbox as a way of inspiring photographers, to create better images and successful businesses. [Read More]

Email Templates For Headshot Photographers

Email Templates for Headshot Photographers

Recent Posts

  • How Capture One Changed My Event Photography
  • 10 Steps To Stay Positive In Times Of Great Stress
  • Why You Need To Read “Personal Branding For Photographers” Now
  • How To Master Your Website Content Step By Step?
  • Tony Taafe’s TNT Method For Headshot Photographers

Recent Comments

  • Stephen Davison on Are You A Business Owner Who Is Smart, But Stuck?
  • Ben A. on Don Giannatti Clinches The 8th Annual Tiffinbox Award
  • Dan on Don Giannatti Clinches The 8th Annual Tiffinbox Award
  • Donald Giannatti on Don Giannatti Clinches The 8th Annual Tiffinbox Award
  • Stephen Davison on G.E. Masana’s 6 Strategies For Wedding Photography Success
  • Naveen Kumar on Weddings In India Are More Than Being At The Right Place And At The Right Time
  • kartick on Weddings In India Are More Than Being At The Right Place And At The Right Time
  • Leonid Farbman on 6 Uncommon Trends To Grow Your Photography Business
  • Willow and Finch Wedding Photography on 11 Reception Tips To Help Your Wedding Photography
  • Web Designer Malaysia on How To Optimize Your Squarespace Website For Search Engines
  • Creastan on An Interview With Photojournalist G.M.B. Akash
  • Cindy Brown | Atlanta on An Open Letter To A Local Photographer

Become a Patron!

Copyright © 2026 · Tiffinbox · Site Design by Heather Mackan Creative · Built on Genesis