• Photography
  • Interviews
  • Business
  • Reviews

Tiffinbox

Inspiring Photographers

  • Home
  • About
  • Blog
  • Contact

Light It, Shoot It, Retouch It by Scott Kelby

September 7, 2012 by Eileen Earnest

This guest blog is by Eileen Earnest, an expatriate photographer who lives in Abu Dhabi. Follow her on Twitter.

Light It, Shoot It, Retouch It is the latest in the Kelby Training Series. I am a fan of Kelby’s how-to books for several reasons. The first and best is that Scott Kelby is funny. I find it fairly impressive to make an instruction manual entertaining, and he does just that. His writing tone gives the impression that is just how he comes across in a conversation. Quite a skill to have and I gravitate to his books because of that ability to make me laugh now and then amongst fairly dry material.
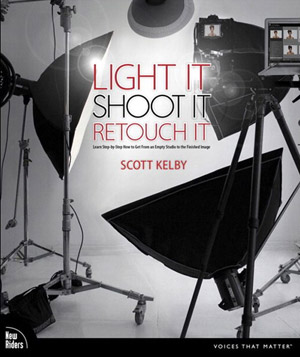
I own two other Kelby books, one on Photoshop and the other on Lightroom. They both provide clear, easy to follow instructions and many, many photos. They are good books. But Light It, Shoot It, Retouch It is different-good. Here’s how: In any type of instruction book, typically the author starts with the most basic, foundational stuff. Then they build, build, build. If I am interested in a specific aspect of the program I am reading about, it might be page 193 before I get my answer. Light It, Shoot It, Retouch It gives photographers exactly what they need, each step of the process, and it’s complete from start to finish in under 20'ish pages. Some chapters are even shorter, but still chock full of all the information and detailed instruction on getting the best photo, during and after the shoot.

The Info Before the Info and the Info After the Info

Each type of shoot is described in the book as it’s own chapter. However, before we even start the first lighting set up, Kelby gives us eleven things we need to know prior to diving in. He has some equipment suggestions and points the reader to his online companion to the book.

Every chapter is accompanied with detailed photos of the background and lighting configuration so Scott also explains how to read these. These eleven tips are followed by an equally important list of ten tidbits that he wishes he had known before using studio lights. And yes, I also wish I had known these things, so thank you, Scott! On a personal note, I’ve only worked in a studio for the last 4 months. Setting up the lighting and making the transition from only natural light photography is no small task. This quick section of the book is well placed and very important to any photographer who is getting his or her own studio off the ground.

Towards the end of the book, there is a look at each of the setups with hot shoe flashes instead of strobes. In addition, there is a comprehensive gear list as seen in the different shoots. Scott Kelby shoots Nikon, which I have decided to not hold against him, but it is easy to figure out the comparative Canon equipment when necessary. (Also, he flip-flops between using a Nikon and Canon body for the back-of-camera photograph in each chapter so no one feels left out. The list of modifiers was incredibly essential to me as I find myself randomly buying gear at times. I would have made better choices with a little more direction before purchasing. This is a perfect wish list of studio equipment.

Chapter By Chapter, Shoot By Shoot

The next twelve chapters describe in thorough, but concise, detail each different style of photography he is shooting. We begin with a 3-Light Classic Beauty Setup, and continue through eleven other types of lighting. I imagine Scott started with the 3-Light Classic because it’s such a common set up in the studio. My favorite “style” in the book, however, is the 3-Light Sports Setup. It’s so simple but the final image is evokes a sense of strong, silent power. The full length set up was particularly helpful, as I tend to struggle with evenly lighting from head to toe. With each of the twelve set ups, we get to see Kelby actually shooting the subject and the light configuration, including the power settings on the strobes. There is literally no better way to explain how he took this photo than by showing us a photograph of how he took this photo. Actually, FOUR photographs for each lighting set up. Plus, each chapter starts with the final image placed next to the contact sheet from the shoot. Seriously, it could only be more helpful if Scott Kelby himself came to my studio, set up my lights and held my camera for me!

Wait! It Gets Better!

What comes next, however, was even more eye-popping. Scott details his retouching, step by step. Not in a general, “if you’d like to remove a blemish you might choose the spot healing tool…” but in a, “I am removing this blemish on this eyelid with this tool,” method of instruction. Combine this level of detail with Scott’s conversational writing tone, and it’s as if he’s standing over your shoulder pointing to the right keystrokes! I can only imagine the depth of his love of teaching and sharing of knowledge that Kelby must have to go into such detail as he shares his tricks of the trade. Even if you feel pretty confident in your lighting ability and your shooting is sharp, the quick, specific and step-by-step Photoshop aspect of this book is worth its weight in gold. Ok, this man is the President of the National Association of Photoshop Professionals, and he clearly knows Photoshop much more thoroughly than the rest of us mere mortals. Still, he makes it look so darn easy and intuitive! I came away from the book believing if I can read, I can make these edits happen.

Does It Work?

To test my “literacy is the only requirement” theory, I decided to choose a lighting set up and follow Scott’s directions as closely as my equipment will allow. My test will sample the 3-Light Classic Beauty Setup. I don’t have a beauty dish, so I am using a 24×24 soft box. My bottom light is a 24×34 soft box on a strobe.

Eileen Earnest Portrait Set Up

The first hiccup: No flexible arm on my light stands. To remedy this, I had to remove the boxes from the stands and prop them on the floor. My model would have to kneel … not ideal, but it worked! The photo [PHOTO 1] below shows the position of the lights and backdrop.

Ok, here is the straight out of camera (SOOC) image:

Eileen Earnest Portrait Straight Out Of Camera Image

I have a few disclaimers to make about following Scott’s steps in Photoshop.

#1. I am a self taught PS user. Before upgrading to CS6, I found everything (I thought) I needed in Elements. This is another reason why LI, SI, RI is the perfect tool at this stage in my learning process.

#2. I have a horribly unsteady hand and do not typically retouch this much because I do not shoot glamour or beauty shoots. Really, I am the perfect candidate for this test because I am basically a novice user. I followed step by step, skipping only that did not apply to my photo. The blemishes were removed, skin softened, dodged and burned, eyes brightened, unsharp mask applied.

Suzanne, my willing model, has long dark, wispy hair as you can see from the image below:

Eileen Earnest Portrait Enhanced Image

I didn’t remove as many wisps as Scott may have, but instead focused on smoothing down above her head and removing flyaway hairs on her face. Again, I think a more experienced user could do a better job. However, the question is, can someone follow along with the instruction in the book and get a decent result? I believe yes! The steps are there; the technique and ease will come with a lot of practice.

At the end of the day, we have so many books to choose from as photographers. Picking one that will literally come in handy on a weekly basis ensures my time and money is not wasted. I feel confident that Light It, Shoot It, Retouch It by Scott Kelby will not get dusty on my shelf nor will it on yours.

Filed Under: Books, Photo Books, Photography, Review Tagged With: 3 light, abu dhabi, eileen earnest, light photography, Lighting, national association of photoshop professionals, natural light photography, retouching, scott kelby, shooting, studio light, the shoot

56 Rocking Fusion Photoshop Actions

March 6, 2011 by Seshu | Editor & Publisher

When it comes to Photoshop actions, I have a short stack of them that I depend on for retouching my portrait and wedding photography images. I go to these almost all the time, for all my images. We'll talk about which one of those actions made the cut, in a subsequent blog post. So please do remind me.

Jodi Friedman of MCP Actions sent me an email asking me to test a new set of Photoshop actions that she was launching called MCP Fusion Photoshop Actions. So, let me at the outset tell you that I received them gratis for the expressed purpose of reviewing and writing about them here.

The MCP Fusion Photoshop action set combines the most versatile and user-friendly workflow actions with beautiful color and black and white conversions, bringing you an action set with infinite possibilities.

It makes sense to review actions only when you have some really good examples. The image below is from a headshot portrait session I recently completed for my client Carole M.

Straight out of camera, otherwise known as SOOC:

MCP Fusion Photoshop Actions © Seshu Photography

Enhanced using the Liquify filter in Photoshop + MCP Actions' Eye Doctor and The Dentist:

MCP Fusion Photoshop Actions © Seshu Photography

Enclosed action:

MCP Fusion Photoshop Actions © Seshu Photography

Beach House action:

MCP Fusion Photoshop Actions © Seshu Photography

Sentimental action:

MCP Fusion Photoshop Actions © Seshu Photography

Pendulum action:

MCP Fusion Photoshop Actions © Seshu Photography

Color Fusion Mix-n-Match action – Peachy/Rustic/Sentimental/Shades Of Gray:

MCP Fusion Photoshop Actions © Seshu Photography

In addition to the usual actions to enhance color images, this set includes ways in which you can convert images to black & white. Most of the black & white actions I've seen online have been pretty heavy handed at this, but the Black & White Fusion Mix-n-Match is particularly useful because like its Color counterpart, you are allowed to turn on and off layers and of course dial in the opacity for those layers just to get your desired effect. I really enjoyed this level of control to consistently produce images.

Black & White Fusion Mix-n-Match action – One Click Black & White/Highlight Helper:

MCP Fusion Photoshop Actions © Seshu Photography

See more sample images on Jodi's site and check out this video to show you how you would set these actions up in Photoshop (18 minutes):

The Review:

I'll make this short and sweet. I had a lot of fun exploring these actions. Like any other set of Photoshop actions, I am likely to pick and use only the ones that feel natural to me and for what I want to deliver to my clients. In this regard, to each her/his own. There are several among the MCP Fusion Photoshop Actions have just been added to my short stack. Some of those actions you have just seen above. As I promised at the beginning of this post, I'll have a new article describing those to you in greater detail soon.

I almost never use any action at full throttle, that is the opacity is set to less than 100%. What is that magic number? It's very hard to pin down and kinda silly to even divulge because your images and tastes are different than mine. And these actions by MCP are no different. I toned it down several notches to meet my artistic sensibilities.

The mix-n-match actions were great, but even on a fast iMac, they took about 20 seconds to run. This isn't a shortfall of the action set, but I have to admit it did surprise me a bit. And as Jodi put it, that's 20 actions all running at the same time. If you are trying to get something done quickly, try then the individual actions that come bundled within this set. The mix-n-match is much too comprehensive and may be overkill for what you want to achieve. That said, I liked the multiple options the actions gave me. In my opinion, Photoshops actions are as perfect as you want them to be for your own workflow, sense of style or approach to photography.

Jodi's Photoshop actions are well-known in the industry for a reason – she consistently provides a quality product and her level of support via video tutorials, or in my case a quick email response to a quick question, was always greatly appreciated. If you are open to gaining some control back into how your images should look, you will want to get this Photoshop actions set.

Unsolicited words of advice:

1) Have a vision for how you want to retouch your images. What you present to the world says a lot about who you are as a photographer and an artist. Adding actions willy-nilly is no way to correct a badly exposed image. So start there first. No idea what I am talking about? Try this book by David duChemin. Figure out what the end product needs to be, how it will be applied and who your target audience is. Those answers will direct you into the appropriate use of these or any other Photoshop actions.

2) Make sure your monitor is calibrated. If you want WYSIWYG, this is one of the first steps you should take.

3) Use these actions on un-cropped, high-resolution images first. Then resize and sharpen at the very end of your workflow. The MCP Fusion Photoshop Actions include two nifty actions that will do just this for you, so rest easy.

4) Uncle Ben said it best: “With great power, comes great responsibility.” Just because you can use actions and mix-n-match them up, does not give you license to do so. Well, you could, but then your images are going to make your audience gag a bit.

5) Be aware that as you start adding more actions and you mix-n-match them as you can, your file size is going to inflate and your computer is liable to slow down to a crawl. So have lots of RAM and have a scratch disk for Photoshop to play nice.

6) Have fun. If you aren't having fun when using these or any other actions, that means you are just going through the motions of creating art for your clients and ultimately yourself. So, pace yourself, experiment and stick to the plan (ie. see number 1)

7) You are going to be naturally drawn to some actions over others. Let your gut instinct guide you. You'll know when you have crossed the line, or your friends or even clients may let you know pretty directly. Learn from these trials and move on. Don't cling to an action as the be-all and end-all of all your images. Keep making images and you will find Photoshop actions that are best used to enhance those specific frames. It is a learning process, so don't force it.

If you've enjoyed this post and want more like it, please let me know in the comments below. Also, please support this site by buying the e-books you see here. They have each been reviewed for quality and value and I am sure you will find them just as useful as I have for my photography business.

Filed Under: Photoshop Actions Tagged With: action color, action set, Actions, adobe creative suite, adobe photoshop, application software, black white, enhancing, fusion, graphic design, images, Photography, photoshop, photoshop action, photoshop actions, photoshop plugin, retouching, Workflow

Subscribe To Tiffibox Treats!

Looking for a well-curated email newsletter that will leave you inspired and motivated about your photography business? Sign up below!

About Seshu

Seshu creates relaxed portraits of families and high school seniors in Avon, Connecticut. He also leads a successful headshot photography studio in Connecticut, helping professionals from a variety of disciplines project the very best versions of themselves. He created Tiffinbox as a way of inspiring photographers, to create better images and successful businesses. [Read More]

Email Templates For Headshot Photographers

Email Templates for Headshot Photographers

Recent Posts

  • How Capture One Changed My Event Photography
  • 10 Steps To Stay Positive In Times Of Great Stress
  • Why You Need To Read “Personal Branding For Photographers” Now
  • How To Master Your Website Content Step By Step?
  • Tony Taafe’s TNT Method For Headshot Photographers

Recent Comments

  • Stephen Davison on Are You A Business Owner Who Is Smart, But Stuck?
  • Ben A. on Don Giannatti Clinches The 8th Annual Tiffinbox Award
  • Dan on Don Giannatti Clinches The 8th Annual Tiffinbox Award
  • Donald Giannatti on Don Giannatti Clinches The 8th Annual Tiffinbox Award
  • Stephen Davison on G.E. Masana’s 6 Strategies For Wedding Photography Success
  • Naveen Kumar on Weddings In India Are More Than Being At The Right Place And At The Right Time
  • kartick on Weddings In India Are More Than Being At The Right Place And At The Right Time
  • Leonid Farbman on 6 Uncommon Trends To Grow Your Photography Business
  • Willow and Finch Wedding Photography on 11 Reception Tips To Help Your Wedding Photography
  • Web Designer Malaysia on How To Optimize Your Squarespace Website For Search Engines
  • Creastan on An Interview With Photojournalist G.M.B. Akash
  • Cindy Brown | Atlanta on An Open Letter To A Local Photographer

Become a Patron!

Copyright © 2026 · Tiffinbox · Site Design by Heather Mackan Creative · Built on Genesis