• Photography
  • Interviews
  • Business
  • Reviews

Tiffinbox

Inspiring Photographers

  • Home
  • About
  • Blog
  • Contact

Light It, Shoot It, Retouch It by Scott Kelby

September 7, 2012 by Eileen Earnest

This guest blog is by Eileen Earnest, an expatriate photographer who lives in Abu Dhabi. Follow her on Twitter.

Light It, Shoot It, Retouch It is the latest in the Kelby Training Series. I am a fan of Kelby’s how-to books for several reasons. The first and best is that Scott Kelby is funny. I find it fairly impressive to make an instruction manual entertaining, and he does just that. His writing tone gives the impression that is just how he comes across in a conversation. Quite a skill to have and I gravitate to his books because of that ability to make me laugh now and then amongst fairly dry material.
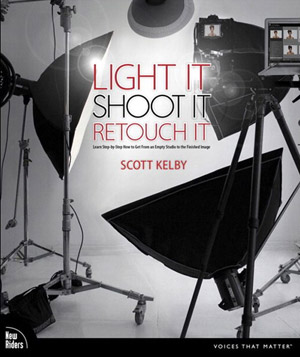
I own two other Kelby books, one on Photoshop and the other on Lightroom. They both provide clear, easy to follow instructions and many, many photos. They are good books. But Light It, Shoot It, Retouch It is different-good. Here’s how: In any type of instruction book, typically the author starts with the most basic, foundational stuff. Then they build, build, build. If I am interested in a specific aspect of the program I am reading about, it might be page 193 before I get my answer. Light It, Shoot It, Retouch It gives photographers exactly what they need, each step of the process, and it’s complete from start to finish in under 20'ish pages. Some chapters are even shorter, but still chock full of all the information and detailed instruction on getting the best photo, during and after the shoot.

The Info Before the Info and the Info After the Info

Each type of shoot is described in the book as it’s own chapter. However, before we even start the first lighting set up, Kelby gives us eleven things we need to know prior to diving in. He has some equipment suggestions and points the reader to his online companion to the book.

Every chapter is accompanied with detailed photos of the background and lighting configuration so Scott also explains how to read these. These eleven tips are followed by an equally important list of ten tidbits that he wishes he had known before using studio lights. And yes, I also wish I had known these things, so thank you, Scott! On a personal note, I’ve only worked in a studio for the last 4 months. Setting up the lighting and making the transition from only natural light photography is no small task. This quick section of the book is well placed and very important to any photographer who is getting his or her own studio off the ground.

Towards the end of the book, there is a look at each of the setups with hot shoe flashes instead of strobes. In addition, there is a comprehensive gear list as seen in the different shoots. Scott Kelby shoots Nikon, which I have decided to not hold against him, but it is easy to figure out the comparative Canon equipment when necessary. (Also, he flip-flops between using a Nikon and Canon body for the back-of-camera photograph in each chapter so no one feels left out. The list of modifiers was incredibly essential to me as I find myself randomly buying gear at times. I would have made better choices with a little more direction before purchasing. This is a perfect wish list of studio equipment.

Chapter By Chapter, Shoot By Shoot

The next twelve chapters describe in thorough, but concise, detail each different style of photography he is shooting. We begin with a 3-Light Classic Beauty Setup, and continue through eleven other types of lighting. I imagine Scott started with the 3-Light Classic because it’s such a common set up in the studio. My favorite “style” in the book, however, is the 3-Light Sports Setup. It’s so simple but the final image is evokes a sense of strong, silent power. The full length set up was particularly helpful, as I tend to struggle with evenly lighting from head to toe. With each of the twelve set ups, we get to see Kelby actually shooting the subject and the light configuration, including the power settings on the strobes. There is literally no better way to explain how he took this photo than by showing us a photograph of how he took this photo. Actually, FOUR photographs for each lighting set up. Plus, each chapter starts with the final image placed next to the contact sheet from the shoot. Seriously, it could only be more helpful if Scott Kelby himself came to my studio, set up my lights and held my camera for me!

Wait! It Gets Better!

What comes next, however, was even more eye-popping. Scott details his retouching, step by step. Not in a general, “if you’d like to remove a blemish you might choose the spot healing tool…” but in a, “I am removing this blemish on this eyelid with this tool,” method of instruction. Combine this level of detail with Scott’s conversational writing tone, and it’s as if he’s standing over your shoulder pointing to the right keystrokes! I can only imagine the depth of his love of teaching and sharing of knowledge that Kelby must have to go into such detail as he shares his tricks of the trade. Even if you feel pretty confident in your lighting ability and your shooting is sharp, the quick, specific and step-by-step Photoshop aspect of this book is worth its weight in gold. Ok, this man is the President of the National Association of Photoshop Professionals, and he clearly knows Photoshop much more thoroughly than the rest of us mere mortals. Still, he makes it look so darn easy and intuitive! I came away from the book believing if I can read, I can make these edits happen.

Does It Work?

To test my “literacy is the only requirement” theory, I decided to choose a lighting set up and follow Scott’s directions as closely as my equipment will allow. My test will sample the 3-Light Classic Beauty Setup. I don’t have a beauty dish, so I am using a 24×24 soft box. My bottom light is a 24×34 soft box on a strobe.

Eileen Earnest Portrait Set Up

The first hiccup: No flexible arm on my light stands. To remedy this, I had to remove the boxes from the stands and prop them on the floor. My model would have to kneel … not ideal, but it worked! The photo [PHOTO 1] below shows the position of the lights and backdrop.

Ok, here is the straight out of camera (SOOC) image:

Eileen Earnest Portrait Straight Out Of Camera Image

I have a few disclaimers to make about following Scott’s steps in Photoshop.

#1. I am a self taught PS user. Before upgrading to CS6, I found everything (I thought) I needed in Elements. This is another reason why LI, SI, RI is the perfect tool at this stage in my learning process.

#2. I have a horribly unsteady hand and do not typically retouch this much because I do not shoot glamour or beauty shoots. Really, I am the perfect candidate for this test because I am basically a novice user. I followed step by step, skipping only that did not apply to my photo. The blemishes were removed, skin softened, dodged and burned, eyes brightened, unsharp mask applied.

Suzanne, my willing model, has long dark, wispy hair as you can see from the image below:

Eileen Earnest Portrait Enhanced Image

I didn’t remove as many wisps as Scott may have, but instead focused on smoothing down above her head and removing flyaway hairs on her face. Again, I think a more experienced user could do a better job. However, the question is, can someone follow along with the instruction in the book and get a decent result? I believe yes! The steps are there; the technique and ease will come with a lot of practice.

At the end of the day, we have so many books to choose from as photographers. Picking one that will literally come in handy on a weekly basis ensures my time and money is not wasted. I feel confident that Light It, Shoot It, Retouch It by Scott Kelby will not get dusty on my shelf nor will it on yours.

Filed Under: Books, Photo Books, Photography, Review Tagged With: 3 light, abu dhabi, eileen earnest, light photography, Lighting, national association of photoshop professionals, natural light photography, retouching, scott kelby, shooting, studio light, the shoot

Quick And Simple Photo Shoots

June 24, 2011 by Dan Watkins

Today's guest blog is by Dan Watkins, a widely-published photographer based in Boston, Massachusetts. He is a frequent contributor to the Improper Bostonian. Follow him on Twitter.

I was recently on-location at a Boston restaurant, photographing some food to accompany a magazine piece, when the manager struck up conversation. He reminded me that, when scheduling the shoot, I had mentioned only needing about twenty or thirty minutes to photograph. He then said he was ‘curious' to see what I would produce in such a short time.

The word curious appears in quotes because the tone in his voice led me to believe he actually meant ‘skeptical'. After talking with him more, it turned out most photographers the restaurant had worked with previously did produce great images, but either took a really long time doing so or used so much lighting equipment and modifiers that it became a serious disruption to the restaurant's customers and staff.

This conversation made me realize that there must be something to the adages ‘keep it simple' and ‘less is more' – even when applied to photography. So how can one keep it quick and simple on shoots?

Plan Ahead

My 20-30 minute estimate was based on the fact that we would only be shooting one or two dishes and that I was going to shoot predominantly with available light (adding just an off-camera speedlite if necessary). Since I knew the dishes would need to be prepped, cooked and plated, I also knew I could use that time to check out the location, look for a few good angles to use as backgrounds, and start setting my camera and flash accordingly. I was confident that a half hour would be more than enough time to get plenty of options for the magazine.

Food Photography By Dan Watkins

Food Photography By Dan Watkins - Cocktail

Minimize Lighting Gear and Utilize Available Light Instead

There are instances where shooting with ambient light rather than relying heavily on additional equipment is okay. Sure it's fun to see what sort of stylized images you can create with a four-light or more setup, but that might be something better suited for personal work instead of a client shoot in a public space. Just because you've grown an arsenal of lighting and modifiers doesn't mean there's anything wrong with leaving them home and going back to basics now and then. Less equipment also means less to go wrong, allowing you to focus more on making great photos!

Know How to Control The Available Light

Using ambient light as a main light source isn't enough if you aren't sure how to make it work for you. Pay attention to the quality, color and direction of the light on location and use it to your advantage. For example: using your aperture to control how warm or cool a space lit with tungsten appears on camera, or angling subjects so windows behind them or to the side provide a nice rim-light to separate them from the background.

Food Photography By Dan Watkins - Salad

Food Photography By Dan Watkins - Main Meal

Trust Yourself

Many photographers are far too critical of themselves. While this mentality might have its advantages while editing down a portfolio, for example, it usually doesn't help while on a shoot. Part of the reason a client hires a professional photographer is for their eye. They trust you have the confidence to portray their subject effectively, and so should you.

Know When You've Got The Shot and Move On

Gut feelings play a part in other aspects of professional photography – from what clients we choose to work with, to negotiating creative fees – so there's no reason to ignore them on a shoot. If it feels like you've got the shot, you probably do. It's easy to feel the pressure to over deliver and keep photographing a subject from every possible angle to ensure the client has many options. Most clients, however, prefer choosing between a few really strong images to narrowing down hundreds of minor variations.

Food Photography By Dan Watkins - Fried Fare

Food Photography By Dan Watkins - Variety

While I hadn't even considered my minimal gear and fast-paced process on similar shoots before this conversation, the simple and quick nature of the session was not lost on the manager. In fact, as soon as I finished he asked about my availability and interest in coming back to photograph for the restaurant.

None of this is to say you should always rush through your shoots. Nor should you leave your strobe kit packed away long enough to gather dust. But knowing when and how to work quickly and simply to bring out a location's most flattering light, as well as having the confidence to know when you've got the shot and wrap things up, are definitely attributes that some clients will notice and appreciate.

Food Photography By Dan Watkins - Entree

Food Photography By Dan Watkins - Cocktail

Filed Under: Photography Tagged With: Boston, boston restaurants, dan watkins, Flash, food photography, improper bostonian, lighting equipment, photo shoots, photographer, photographic lighting, Photography, quick and simple, shooting, simple photos

Going Wireless: PocketWizard For Off-Camera Flash

June 15, 2011 by Seshu | Editor & Publisher

The very core of the Strobist experience is to use your flash units off-camera or studio strobe units on location. There are a lot of options in the market now that can help you do just that. From personal experience, though, I have used the PocketWizard Plus II Transceivers. More recently I switched to Paul C. Buff's CyberSync system. Now I am considering returning back to PocketWizard.

These two videos below by Mark Wallace have convinced me to make the move back. The videos show how the new units work with the Nikon camera and flash systems. I suspect, however, the way these units operate won't be too radically different if you are using a Canon system. So everyone is welcome!

How To Shoot With PocketWizard MiniTT1 and FlexTT5

How To Use The PocketWizard AC3 Zone Controller

For using these units on a Canon system, check out these video tutorials.

By sheer coincidence, I won these units some time back. So, you'll see an “open-box” video very soon. Stay tuned! Thanks to Mark Wallace and Phil Bradon of Mac Groups for sending me the Nikon version of these PocketWizard units. I can't wait to go out and play with them.

Below, tell me if you have considered buying these units or you have already invested in a RadioPopper or some other wireless system. Do you work with flash off-camera or studio units for your shoots? Do you have questions on how to set those up? Would you find it useful if there were more tutorials posted here on Tiffinbox? Let me know!

Filed Under: Off-Camera Flash, Photography, Reviews Tagged With: camera flashes, cameras, digital photography, electronics, Flash, j. mark wallace, live preview digital cameras, nikon, nikon camera, off-camera flash, Photography, pocketwizard, red digital cinema camera company, shooting, strobist, technology, Video, video tutorials, zone controller

What Happens When A Canon Shooter Uses A Nikon?

May 20, 2011 by John Edgar

John Edgar is an internationally renowned wedding and portrait photographer who travels the globe documenting moments and creating art of his discerning clients. He is based out of the beautiful city of Toronto, Canada.

I’ve been take pictures for over 10 years, and worked as a full time photographer for 6 of those. I don’t feel that any topic has been more discussed than Nikon vs. Canon. In fact, the number one question I always get as a photographer is just that. Until last weekend, Canon was the only system I have ever shot. I started with a Canon 300D post college, picked up a 30D shortly after, and the day the 5D came out, I had one. I shot the 5D for many, many years until I recently switched to the 5D mkII and 1Series bodies.

I’ve been a prime shooter since day one, originally with the plastic fantastic (50mm 1.8), upgrading from the 1.8 to the 1.4, and more recently the 1.2. My daily drivers are the 35 1.4, 50 1.2, 85 1.2 and 135 2.0.

After much conversation at the Mystic 6 convention I came to the conclusion that I should at minimum play around with a Nikon setup to see what I think. It would be quite ignorant of me to stand behind my Canon love having never given Nikon a fair run, right? My friend Steve Sager agreed to let me come out and shoot a wedding with him, and bestie Tara McMullen agreed to lend me her Nikon gear for the day.

Full disclosure: I was sure I wasn’t going to like the system, but I resigned myself to the fact that I would indeed give it a fair shot, and leave my bias at home. I’m not an overly techie person. I understand camera and imaging technology but I don’t obsess over custom functions and AF point placement algorithms. I like taking pictures, and hope my camera for the most part “just works”. I guess as a result, my commentary won’t be particularly technical.

Armed with a D3s, 35, 50, 85 and 135mm lenses, I left my beloved Canon bodies at home and ventured off to shoot a wedding.

The Preparation

I arrived in the morning at the groom’s house to shoot preps. The family was Portuguese and everything was moving along quite quickly. This wasn’t anything usual for me, but I felt it was definitely a great opportunity to put the D3s through it’s paces. I like the 35 1.4 in the morning, for preps. It gives a great sense of place and as a result it’s almost always my go-to lens for that portion of the day. I stuck it on the D3s and started snapping. We were upstairs and the bedroom was quite dark. I didn’t have a flash on (mostly because I like to shoot available light) so I was pushing the ISO into the 1200+ range.

My first immediate and extremely frustrating observation was that the autofocus was slow to acquire a focal lock and to allow me to fully depress the shutter button. With my 5D mkII, it almost never hunts around for focus. With the D3s, I felt like it was just sitting there thinking about what to do next, while I was missing some great moments. To be honest, it really, really annoyed me. However, when it did finally acquire AF lock and I made an image, the focus was spot on. This wasn’t really something I had ever thought about before, and sparked an internal conversation of “would I rather have the image, but out of focus, or miss a few for something sharp” (more on that later). Generally, a pretty high proportion of my images shot with my Canon system are out of focus, mostly because it just can’t seem to focus on the right thing. This has been a frustration for a while and definitely my main friction point with the Canon system.

Nevertheless, I pushed on shooting. I was tweeting as I went and Paul Johnson offered some insight into a change I could make in the camera settings that would allow for faster autofocus. I made some quick changes, tested it out a bit and found the “continuous” mode to be quicker in low light. After making this change, I did notice a much higher percentage of out of focus images, but still plenty of usable frames coming from the camera.

My next realization about the Nikon system came as I moved from inside the house to the yard out back. I’m a manual shooter so I’m used to changing my exposure on the fly as I move around and the lighting conditions change. Over the years you become accustomed to knowing the settings you need by judging the light and your hands automatically find the settings and plug them in. For me this is something that happens almost subconsciously as I’m shooting. As I quickly ran outside and started shooting my fingers did the usual wheel turns and something struck me. I realized that in less than 30 minutes of using the camera, it felt second nature to me. Believe it or not, after 10 years of shooting on the Canon system I still sometimes get lost and turn things the wrong way or forget where a setting is. I was very, very impressed with how quickly I was able to adapt and learn the Nikon layout, and found it extremely natural and ergonomic. Hours in I said to a guest who asked me about the camera, “it really is a joy to shoot with.”

John Edgar - Wedding with Nikon D3s

The Ceremony

After the preps we headed to the church. It was very dark and I wasn’t about to use the flash during a ceremony. This was the perfect time to test the higher ISO ranges. I sent a quick message to my friend Ryan Brenizer to confirm that the files are pretty clean around 6400 ISO before I went trigger-happy. He gave me the nod and with a smile I set the camera there and went to town. I shot for a bit and then zoomed in to 100% and checked the shadows. Just as Ryan had mentioned: very, very clean. I kept my exposures solid if not slightly to the right and shot the rest of the ceremony 3200/6400.

I had decided to shoot the whole ceremony with 135mm lens. Having had a morning filled with slow AF I was a little worried about it, but plunged in never the less. I switched out of continuous focus back to single focus because my morning tests had left me with a feeling that S was slightly more accurate, and I could afford to slow down a little during the ceremony. As I shot the ceremony, I noticed almost none of the AF lock lag I had observed in the morning. The quality of the light in the church, while dim, was quite a bit better. The shadows were more even, and had less contrast. Without knowing the in-depth technical aspects of AF, my gut feeling is this helped. After shooting I went through the frames on the back of the camera at 100% zoom checking the focus. I noticed that about 85% of them were sharp and focused as I expected. This is about 30-40% better than what I generally experience off of my Canon bodies.

The Photo Session

In “Canonland” I shoot 90% of the photo session with the 50 1.2 so I decided to shoot with the Nikon 50 1.4 I had. I immediately noticed that the bokeh was totally different. At first I thought I had my aperture set wrong, I wanted to be wide open but what I was seeing looked like I was at f2/2.8. (I’m not going to debate the merits of bokeh here, that would be stupid. It’s all personal preference.) Going back over the images and looking at my Canon work, I personally like the look of the out of focus areas on my Canon glass much much better. I switched over to the 35 1.4, and set it to 1.4, again I really didn’t like the way the glass rendered out of focus light. It was also during the photo session that I noticed the general hue of the image was drastically different than what I was used to seeing on the back of the camera. At that point I didn’t know if that was the RAW rendered jpg, the screen, the light I was in, my eyes or what. Having now looked at the files side by side in ACR I definitely feel that a CR2 file has more of a magenta hue to it than a NEF. Nikon raw files generally seem warmer/orange. This is also to my mind a hue difference, not simply white balance related. I don’t really have a clear opinion on that either way at this point, so I’m merely making the observation. Do as you will with it.

John Edgar - Wedding with Nikon D3s

The Reception

After the photo session we headed to Liberty Grand where the reception was held. Anyone local to Toronto knows how brutal shooting in this hall can be. The ceilings are dark wood and a good 30 feet high. Bouncing isn’t much fun in there, but if you aim for the walls and get the angle right it’s doable. I’ve shot the venue 20+ times so I’m used to it, but I wasn’t used to the SB900. I was told to keep it in manual mode because it sometimes overheats and shuts down in TTL. This initially put me off a bit, but I compensated for it manually and it was fine.

As I shot, I found that my ability to pull in a lot of ambient light was great! The high ISO I used gave me much more flexibility with the flash than I usually afford myself with my 580EXII. I really liked the exposures I was getting. At one point during the evening the flash batteries died and before I had a chance to replace them, the father of the groom pulled me over and demanded a quick shot with some of the groomsmen. I didn’t have batteries in my pocket so I thought “to hell with it” and cranked the ISO into H1. It was almost pitch black and the (very) intoxicated groomsmen wouldn’t stay still. I grabbed a few frames and I was pleasantly surprised with them. The final image will have to be presented in black and white, however it was sharp and fairly well exposed.

As I finished out the night, I felt the strain in my arm. The camera is more weight than I’m used to for a 13 hour day and my wrist was starting to ache a little. If I’m to do this for another 10-15 years I feel heavy bodies are going to cause some long term damage to my right hand. Many of my professors from school now have bad carpal tunnel and arthritis from shooting for 20+ years. I guess the alternative is to shoot a D700/D3s combo, as it’s a much lighter body.

John Edgar - Wedding with Nikon D3s

John Edgar - Wedding with Nikon D3s
The Post

When I got home I went over some of the files: zoomed, cropped, pushed, pulled, starred and un-stared. I spent a good few hours figuring out what I liked and what I didn’t. So here is what I’ll say:

The AF focus system is, at worst, much better than anything I’ve experienced with Canon. In continuous focus mode, while a lot of the AF lag is gone, so is a lot of the accuracy. That being said, I still found more of the images to be in than out or at least acceptability soft. During the photo session, shooting with good light in AF-S, the focusing was almost always spot on.

The flash system is good. I know some people hail it as the second coming of Christ, but I truly believe the 580EXII is just as good as the SB900. Feature wise, it does have some nice fancy do-das that the 580 doesn’t, but in terms of just taking a good solid exposure the systems are very, very comparable.

The high ISO noise tolerance on the D3s is unreal. That’s all I need to say about that.
I personally find the layout of the D3s to be fantastic. A lot of the button arrangement and menu options make much more sense to me than the Canon design. For example, where Canon will use a 3 finger strain voodoo dance menu wheel scroll push setting change, Nikon simply has a toggle switch.

Now I realize this is just my personal opinion, but I do not like the bokeh. And as an artist/photographer/whatever, I rely heavily on depth of field as a pivotal element of the work I produce. This will be the main reason I wouldn’t switch systems. Canon has great glass. The colour clarity, the way it renders flair, the out of focus areas, the contrast and general “look” of the images from my Canon are what I fell in love with, and continue to love.

In the wedding space I feel that if those “artistic” elements of photography (that transcendental feel and quality of the image that you just can’t quite put your finger on) are important to you as a Canon shooter, you might find a switch frustrating. If you are a photographer who is very methodical, photo journalistic, technical or moment driven then you should without a doubt be shooting Nikon right now. However I am truly in love with the look of my Canon glass. I’m willing to over shoot and deal with weird white balance and a total inability to focus to have that.

Call me stupid, and maybe I am.

“Popularity does not dictate quality,” says this one Mashable article which coincidentally compares Canon v. Nikon. Check out the infographic. What are your thoughts? Have you given both systems an honest, unbiased try? Tell us your experiences with that “other” system. Go!

UPDATE: John wanted me to let you know that the images presented here are SOOC – Straight Out Of Camera – with the only exceptions being that they were scaled down and sharpened a tiny bit.

Filed Under: Photo Technology Tagged With: autofocus, bokeh, canon, canon 300d, canon eos 5d mark ii, canon shooters, conventions, live preview digital cameras, mystic, nikon, nikon d3s digital camera, nikon system, Photographers, Photography, portrait photographers, shooter, shooting, toronto

Subscribe To Tiffibox Treats!

Looking for a well-curated email newsletter that will leave you inspired and motivated about your photography business? Sign up below!

About Seshu

Seshu creates relaxed portraits of families and high school seniors in Avon, Connecticut. He also leads a successful headshot photography studio in Connecticut, helping professionals from a variety of disciplines project the very best versions of themselves. He created Tiffinbox as a way of inspiring photographers, to create better images and successful businesses. [Read More]

Email Templates For Headshot Photographers

Email Templates for Headshot Photographers

Recent Posts

  • How Capture One Changed My Event Photography
  • 10 Steps To Stay Positive In Times Of Great Stress
  • Why You Need To Read “Personal Branding For Photographers” Now
  • How To Master Your Website Content Step By Step?
  • Tony Taafe’s TNT Method For Headshot Photographers

Recent Comments

  • Stephen Davison on Are You A Business Owner Who Is Smart, But Stuck?
  • Ben A. on Don Giannatti Clinches The 8th Annual Tiffinbox Award
  • Dan on Don Giannatti Clinches The 8th Annual Tiffinbox Award
  • Donald Giannatti on Don Giannatti Clinches The 8th Annual Tiffinbox Award
  • Stephen Davison on G.E. Masana’s 6 Strategies For Wedding Photography Success
  • Naveen Kumar on Weddings In India Are More Than Being At The Right Place And At The Right Time
  • kartick on Weddings In India Are More Than Being At The Right Place And At The Right Time
  • Leonid Farbman on 6 Uncommon Trends To Grow Your Photography Business
  • Willow and Finch Wedding Photography on 11 Reception Tips To Help Your Wedding Photography
  • Web Designer Malaysia on How To Optimize Your Squarespace Website For Search Engines
  • Creastan on An Interview With Photojournalist G.M.B. Akash
  • Cindy Brown | Atlanta on An Open Letter To A Local Photographer

Become a Patron!

Copyright © 2026 · Tiffinbox · Site Design by Heather Mackan Creative · Built on Genesis