• Photography
  • Interviews
  • Business
  • Reviews

Tiffinbox

Inspiring Photographers

  • Home
  • About
  • Blog
  • Contact

Chris Knight On Creating The Dramatic Portrait

June 29, 2017 by Seshu | Editor & Publisher

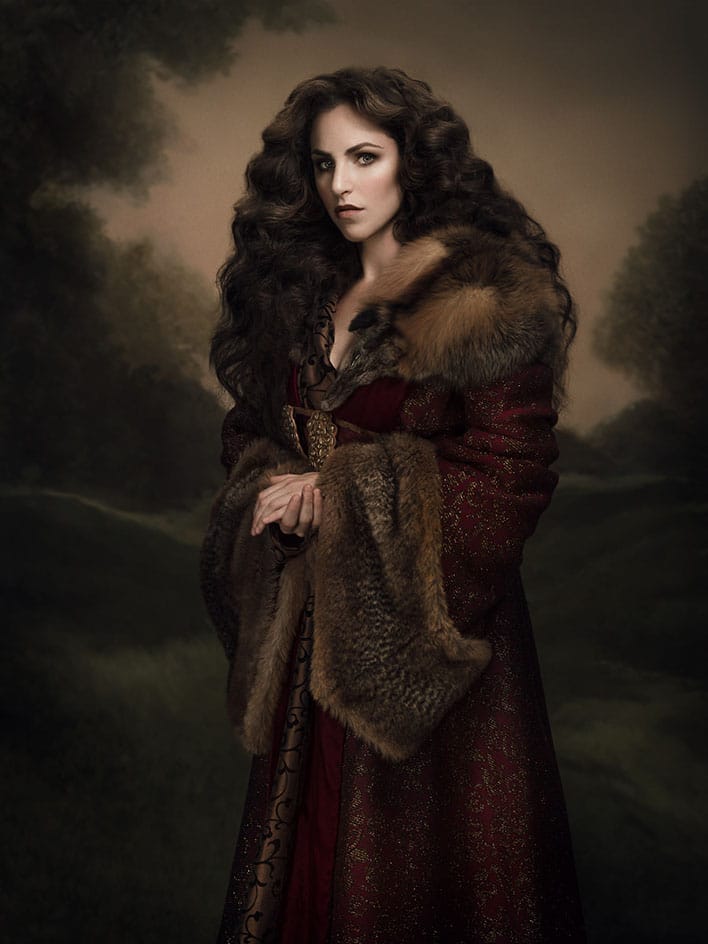
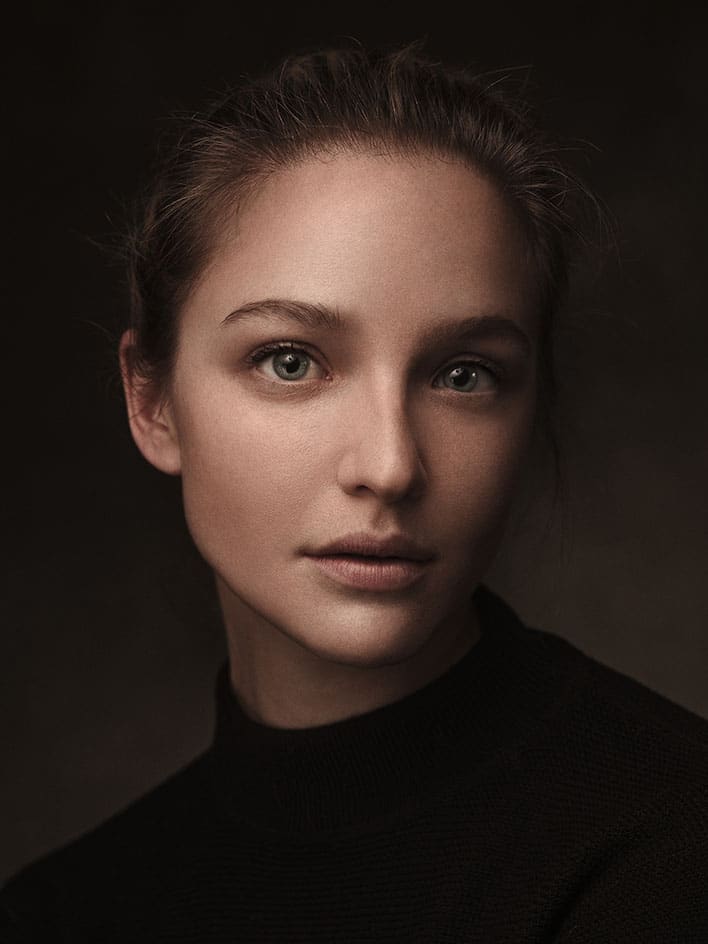
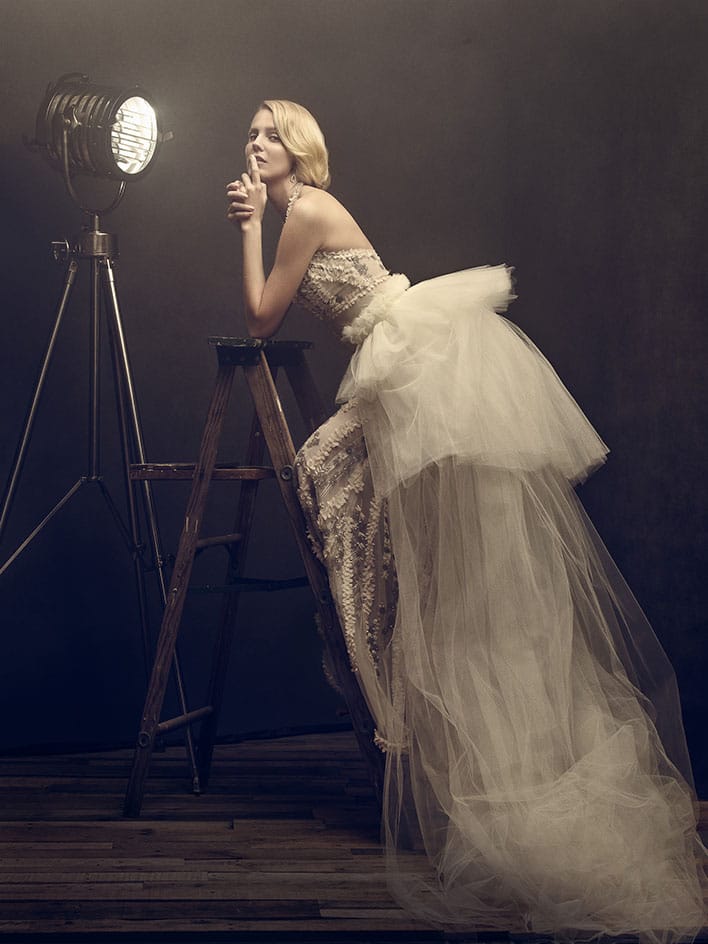
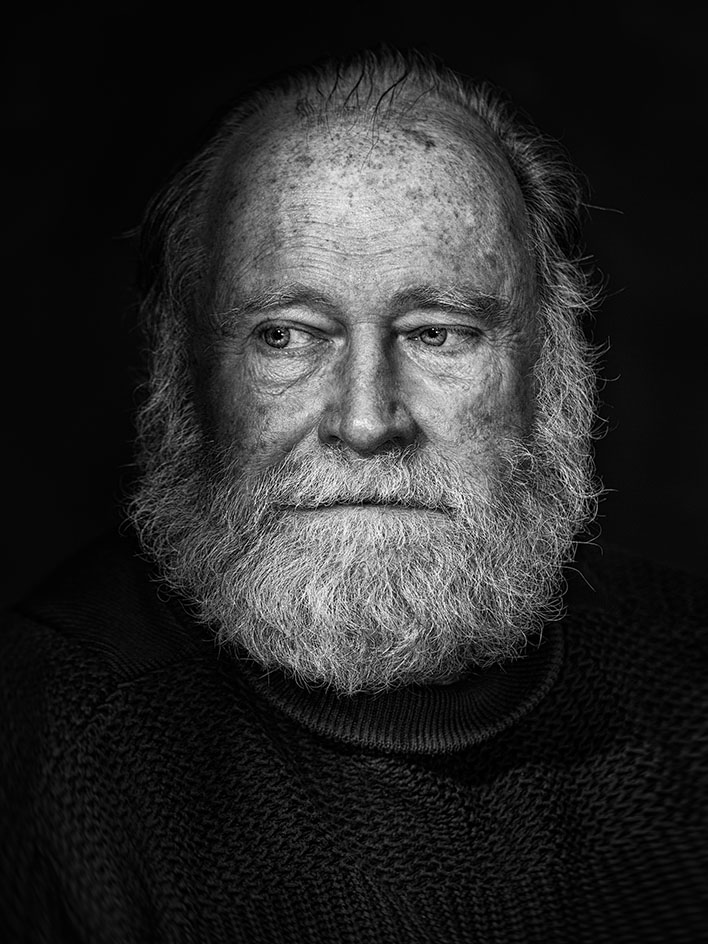
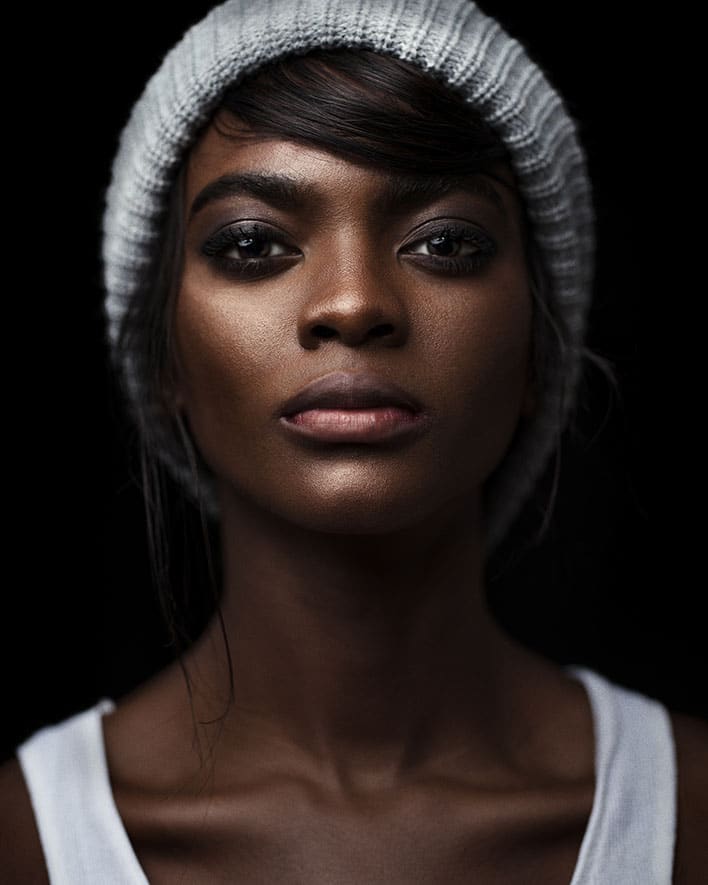
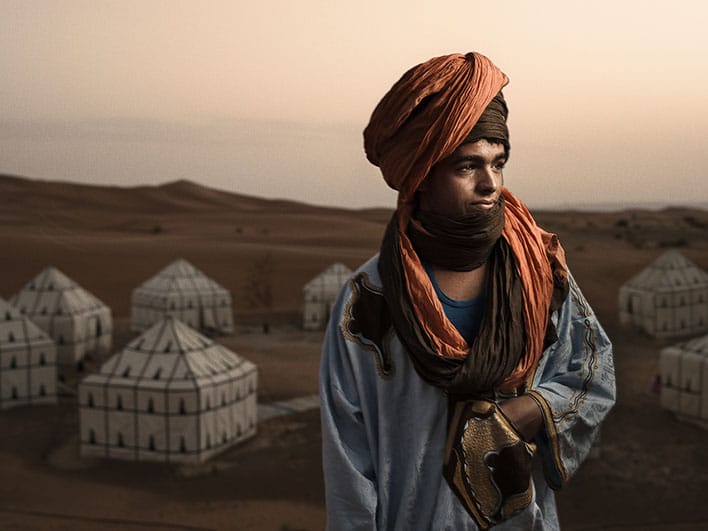
Chris Knight is a photographer based in New York City. We sat down to talk about his upcoming book, The Dramatic Portrait.

He combines his unconditional love of art history with his conditional love of technology, topping it off with a flare for the cinematic and an uncompromising eye for detail.

Chris also has a full blown workshop via RGGEDU.com called Dramatic Portraiture & Lighting With Chris Knight.

The Dramatic Portrait - ProEDU.com Tutorial by Chris Knight

Use the code: TIFFINBOX (to get 15% off for a very limited time)

The Interview

The questions I asked Chris:

1) I love reading biographies on photographer's websites and yours stands out a bit.

Speaking of yourself you say: “He combines his unconditional love of art history with his conditional love of technology, topping it off with a flare for the cinematic and an uncompromising eye for detail.”

Where did you acquire that kind of discipline?

2) Your photographs remind me of paintings that one would see in a museum. Is that your end goal?

3) Why is drama so important to you in portraits?

4) You give light and shadow almost equal value in telling a story. Most of your photographs don't draw attention to the use of artificial light. Is that a skill that was taught to you or is it something that you have honed yourself?

5) Let's talk about your book, The Dramatic Portrait: The Art of Crafting Light and Shadow. What prompted you to write this book and who is it for?

6) Most photography books about portraits jump right into loop lighting or Rembrandt lighting. You spend nearly 40 pages describing the history of portraiture? Why do you believe this is important?

7) You say: “The hows and whys are inextricably entangled in a successful photograph, and hitting both of those points shows mastery of the technical medium.” Can you explain that briefly?

8) What does it mean to you to have a published book? Does it open more doors for you to teach?

9) What can we expect from you next?

10) How can people find you and your work online?

The Dramatic Portrait

Buy Chris Knight's book now or buy the PROEDU.com tutorial today. For a limited time, PROEDU.com is including the book with the purchase of the tutorial.

The Dramatic Portrait, by Chris Knight

Do you prefer to buy The Dramatic Portrait on Amazon?

You can also catch Chris Knight teaching at CreativeLive in these online workshops:

Exploring Low Key Portraiture

Creating Advanced Masks

How To Work Faster In Adobe Photoshop CC

Feel free to use this affiliate link for CreativeLive when you browse through Chris Knight's courses.

The Portrait Portfolio

Here's a small sample of Chris' portrait photography. I urge you to visit his website and bookmark it. It's absolutely stunning work!

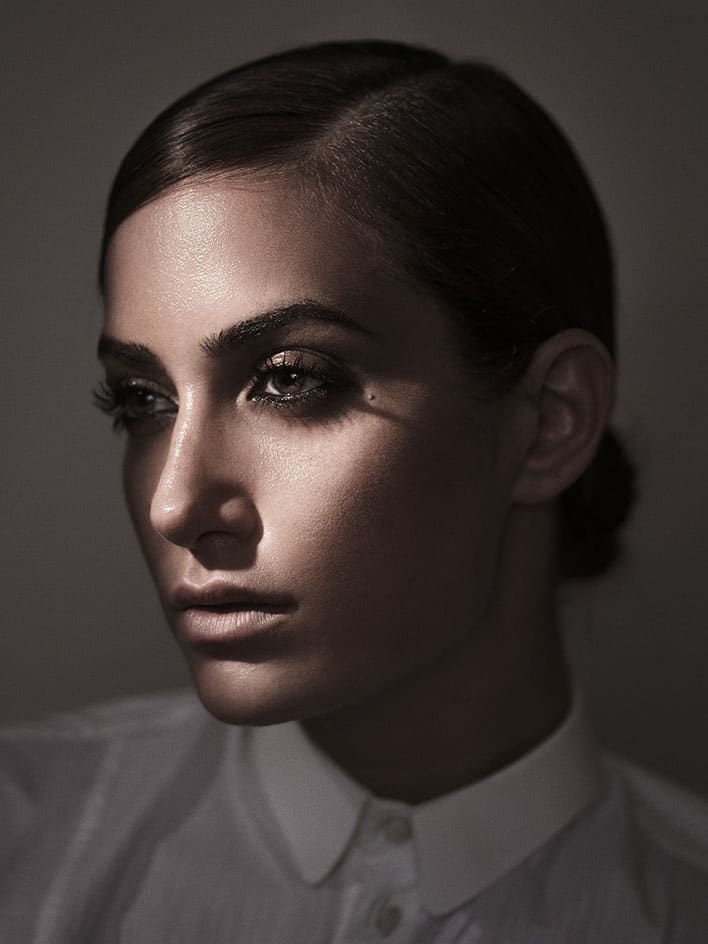
The Dramatic Portrait by Chris Knight

The Dramatic Portrait by Chris Knight

The Dramatic Portrait by Chris Knight

The Dramatic Portrait by Chris Knight

The Dramatic Portrait by Chris Knight

The Dramatic Portrait by Chris Knight

The Dramatic Portrait by Chris Knight

The Dramatic Portrait by Chris Knight

The Dramatic Portrait by Chris Knight

The Dramatic Portrait by Chris Knight

The Dramatic Portrait by Chris Knight

The Dramatic Portrait by Chris Knight

The Dramatic Portrait by Chris Knight

The Dramatic Portrait by Chris Knight

The Dramatic Portrait by Chris Knight

Filed Under: Books, Home Middle Right, Interviews, Lighting, Off-Camera Flash, Photography Tagged With: art history, book, Chris Knight, dramtic portrait, Lighting, museum quality photography, portraiture, posing, rgg edu, rocky nook, style, Tutorials, Workshops

6 Steps to Edit Wedding Photographs in a Single Day

June 25, 2017 by Rohit Gautam

In the digital age, photographers are expected to be adept in photo editing too. It is a fact that purists tend to denigrate editors who add several edits to photographs. But those who use Photoshop as a tool know that the manipulation of images can create a wonderful interpretation too.

Reception photography, especially, happens once in a lifetime. Hence to capture the moments in the camera in the best possible manner is important. But one needs more than that for the full effect. Some use subtlety or highlight some tones more for conveying a moment. One can follow a workflow for post-processing to get images edited in a jiffy!
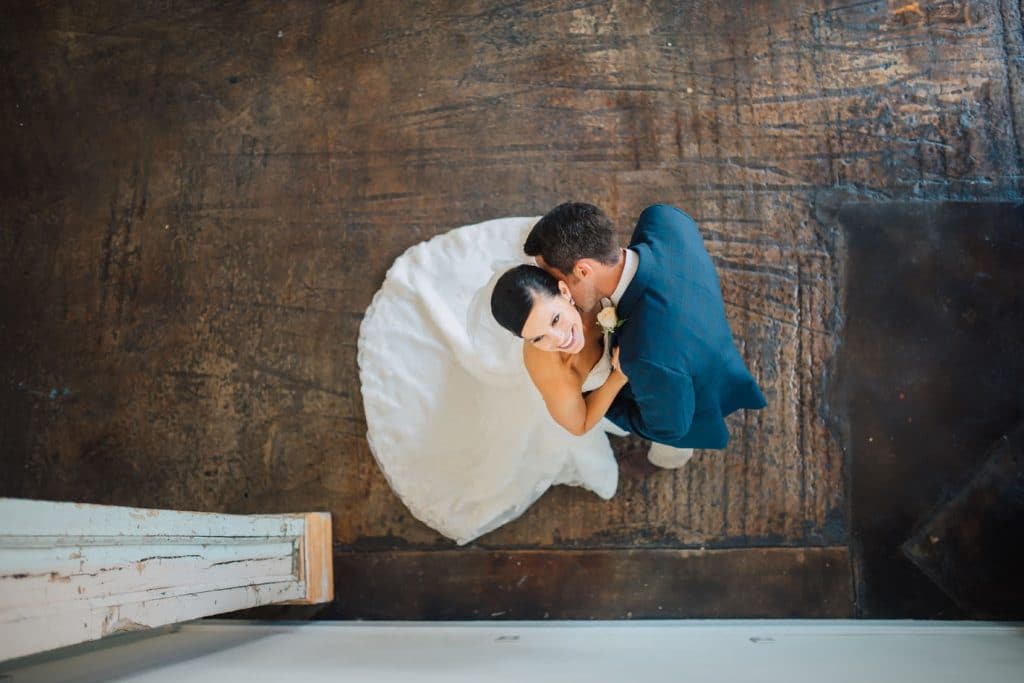
Additionally, Indian wedding photography requires a lot of effort to deliver within a day and to achieve that here are the six techniques that help to derive the best from the wedding images within a single day!

1. Import and Backup (2-3 hours)

The first step involves downloading images through a USB card reader, from the memory card of the camera. Photo Mechanic is a good option to import images although Lightroom can import photographs quickly too. Photo Mechanic is better since it can handle the import process from multiple card readers, especially since a wedding shoot takes a lot of space and cards. Take care of duplicate images with Photo Mechanic’s default feature of managing all images with a single backup.

Back the images when importing them too. Choose a secondary import location, preferably an external hard drive for the same. Keep multiple copies of data so that you can use the saved images in case, a disaster occurs.

2. Culling and Sorting (30 mins – 1 hour)

Reviewing images is a huge task. Photo Mechanic is faster than Lightroom since it doesn’t load the large RAW file and hence moves through several images quicker than ever. You can use some photo viewer software to sort and cull images since it ensures that you can scour through the images equivocally with minimal distractions.

Also if the process were done before import, it would make the catalogue nice and tidy. No one would have to waste time to edit a file that would not be on the final album.

Culling is required for quick reviewing of photographs and gets the right images to be delivered to the client without any hassle. It is tough to identify the best images but the sorting process is worth the pain because being patient and studying one’s own work is essential to create a worthy album quickly.

Choose images you want to keep so that it saves on time. Make quick decisions and refrain from stopping on multiple photographs to compare to one another. Go through all the photographs if you feel there is need for a more critical eye.

3. Editing and Retouching (3 hours)

The time to get the images edited and retouched is huge. After sorting the images, import the selected them into Lightroom for editing. Lightroom is the most powerful photograph editing tool in the workflow. One can add quick adjustments to white balance, exposure settings, brightness, contrast and the like without breaking a sweat. Create black and white copies of the original pictures when adding some candid shots in between the album. Crop, dodge/burn, use vignettes, reduce noise, sharpen the blurry but important images, and make curve adjustments as required.

The editing has to be done for each of the pictures one by one, avoiding similar photographs in the process. One can sync all the adjustments, to save on time. Use batch edit on all similar images at once with slight adjustments for each of them.

4. Exporting Process (45 minutes)

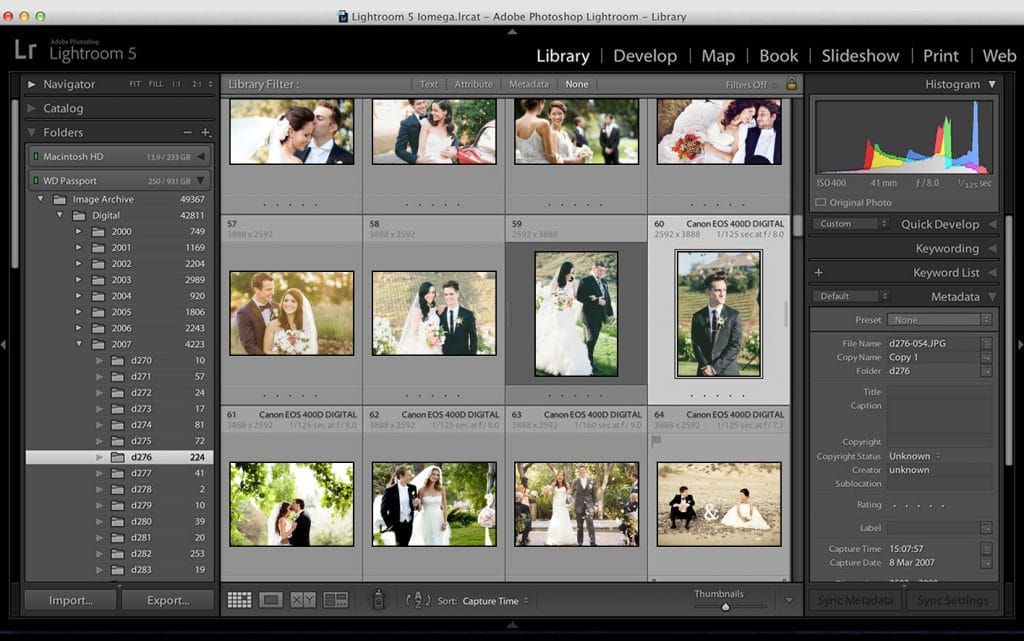
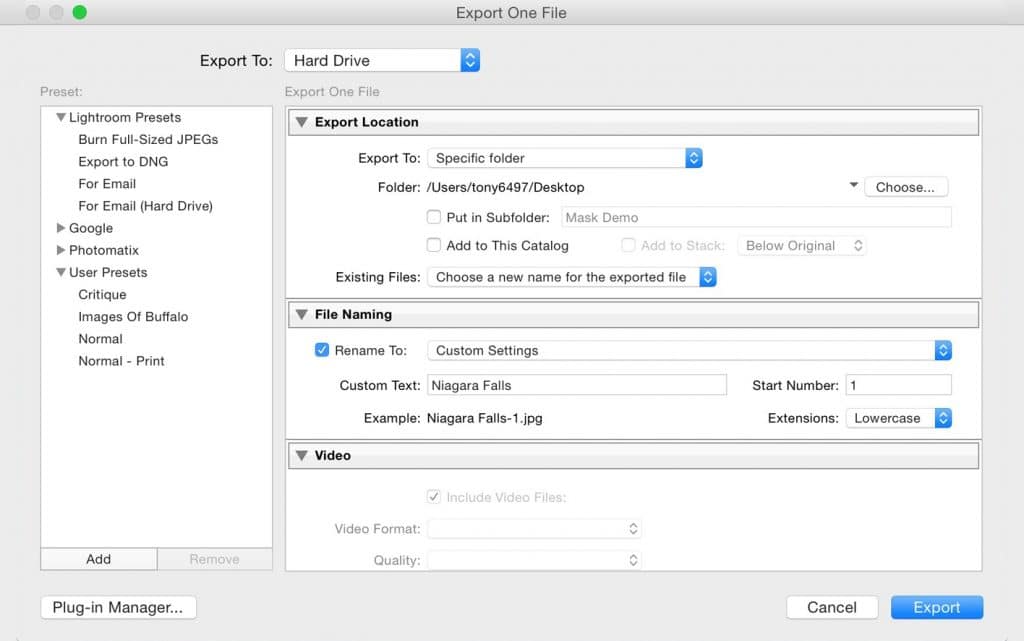
In Lightroom, the process of saving edited photographs is called exporting. This process creates a new file using the edits you made. The exporting process is as follows:

  • Open Lightroom and click on Library Module.Select images you want to export to final album.Click the Export button, which will open a new dialog box that gives a list of options for saving photographs.
  • Click the Export button, which will open a new dialog box that gives a list of options for saving photographs.Under Export Location, chooseUnder Export Location, choose
  • Under Export Location, choose Specific folder and select the correct folder location where you want the final photographs to be saved.
  • Navigate to File Naming and label the photographs as you want to name them. The format “Custom Name-Sequence – Category – Newlyweds’ Names” can be used for naming. For example, one can name the photographs as “WeddingPreparation_CasualPhotographs_JohnBiancaWeds_Pre-wedding”

Lightoom Screen

Sources: 1 & 2

  • In File Settings, choose file format based on preferences. Make sure that ‘Include Video Files’ and ‘Limit File Sizes are unchecked.
  • Navigate to Image Sizing section and set your size and preferred resolution.
  • If photographs are to be printed, make sure ‘Resize to Fit’ box is unchecked and Resolution is set to 300 pixels per inch. If they are saved for web, resize your image by checking the Resize to Fit box and select Width & Height option through the dropdown options.Lower the resolution to 72 pixels per inch.
  • If you want to sharpen images before saving them, scroll to Output Sharpening and check the box. You can choose from Screen, Matte Paper, or Glossy paper out of which type of paper you’ll be printing on.In the right drop down box,choose between Low, Standard, or High for the amount of sharpening, you prefer for your images.

File Exporting Window

Source

  • To add a watermark to the photographs, open Watermarking panel and check the relevant box. Select the watermark from the list.
  • Under Post-Processing, choose what you want to do with images after they are exported.
  • Click on Export button and the process is complete.The dialog box disappears and the status bar at the top left-hand corner will show the ongoing process. When done, the status bar disappears. Back up your hard work now.

5. Uploading Process (1 hour)

After the images are exported, sometimes wedding photographs need to be uploaded for the client. People are known to make albums online that can be accessed from any place. Additionally, the album needs to be arranged in a manner that it conveys the entire wedding scenario; the ceremonies that were held in different places till the last ceremony of the day or night. There should be harmony to all the photographs that were created, so that they are arranged as the client desires. If there are some imperfections, it is important to look into it before the uploading gets done.

6. Delivery (10 minutes)

Since the entire process needs to be done within a single day, it is important to get the affirmation of the order and clarity of each photograph within the wedding album from the client itself. Share a PDF of all the images in low resolution and in the right order, so that the bride/ bridegroom can approve the edits and structure for the final prints. Also, confirm the number of photographs included on the album and if there is any important photographs that might have missed the photo editor, or might have got excluded from the collection.

Discuss the deliverables and its form, so that the high-resolution pictures can be uploaded to the client’s Dropbox account within a single day. If fine prints and album are to be printed, one can commit on printing some pictures within a single day and get them delivered at a premium price.

Filed Under: Photography, Weddings

Simi Jois, On Designing Great Food Photography

April 18, 2017 by Seshu | Editor & Publisher

The Food Photographer

Simi Jois, started as a marketing and branding professional but transitioned to becoming a food photographer. Now based in Chicago, Illinois, her food photography has been featured on MSN, Fox News Magazine, Better Homes, and theKitchn. She is a frequent contributor on the Daily Meal.

Raised in an art-emphasized home subconsciously trained her mind to engage creatively with color, texture, light, shadow and composition. Simi uses photographic images as her canvas and the lens as her brush. She did not have to look far for a subject – her passion for creating flavors provided her with infinite permutations of expression. Painting with ingredients, pairing exotic spices for mutual enhancement and richness of flavor, Simi narrates her stories through the play of light and bold strokes of color.

The Interview

A few weeks back, we sat down to chat about her journey as a food photographer:

Interview Highlights

You will learn that:

1) Simi's parents, both artists, inspired her
2) Her becoming a mom was the catalyst for taking up photography
3) She loves to cook
4) Finding comfort in the ingredients, aroma, and texture motivate her to try different set-ups
5) Her other inspiration are painters from the Renaissance period
6) Simi is creatively challenged to produce photographs that don't look overly styled
7) How the power of observation in day-to-day events and places can help your photography
8) She loves to play with light and uses speed lights, reflectors, and Nikon cameras
9) She is intrigued by shadows just as much as the light
10) How a simple garnish of mint on blueberries can create a punchy image

Simi Jois' Food Photography

Food Photography by Simi Jois

Food Photography by Simi Jois

Food Photography by Simi Jois

Food Photography by Simi Jois

Food Photography by Simi Jois

Food Photography by Simi Jois

Additional Resources

Check out Simi's tutorial on painting prop boards.

Do you want to learn more about food photography? Check out the CreativeLive courses offered here.

Lastly, Don Giannatti is offering a spectacular 8-week food photography course that you simply can't pass up. For $75, it is a no-brainer and in my opinion, there is no better photography instructor to guide you through this wonderful genre of photography.

Don Giannatti's Food Photography Course

Filed Under: Food and Drink, Home Middle Right, Interviews, Photography Tagged With: chefs, chicago, closeups, cooking, designing, food photographers, food photography, Lighting, planning a shoot, shadows, style, top-down

How To Relocate Your Wedding Photography Business

March 31, 2017 by Emily Chappell

Relocate Your Wedding Photography Business, Emily Chappell - Dallas Wedding Photographer

Can we all just agree that moving is the absolute worst? It only takes one or two rounds of packing, unpacking, and starting all over again in a new area to understand how difficult it can be! As a matter of fact, research indicates that “moving is more stressful than a relationship breakdown, divorce, or even a new job.” That is HUGE!

If you're a small business owner who has moved or is getting ready to do so, you're probably feeling the effects of stress and anxiety ten times over. When your local network and reputation is everything, the idea of relocating your wedding photography business can be downright scary! But what if I told you that this doesn’t have to be the case?

Meet Emily Chappell – Dallas Wedding Photographer

My name is Emily Chappell, and I am a Dallas wedding photographer who has been capturing weddings for four wonderful years. I average 20-25 weddings each year and have shot domestically and internationally. In 2015, my family and I were living in South Carolina where I started and successfully grew my business. Due to some significant changes happening in our lives, we agreed that it was time to move back to Texas where both of our families lived. On top of the stress of moving, I was also pregnant with our son, Lincoln – talk about crazy! After our move, I finished out the remaining weddings I had in South Carolina and got very familiar with the Dallas and Atlanta airports. In February 2016, our baby boy arrived and I took a two-month maternity leave. That same year, I shot five weddings in Texas. This year will be my most successful yet with 25-30 weddings, and I am continuing to receive inquiries for 2017-2018.  

If you're a wedding photographer facing the potential of an upcoming move, be it out of state or just a couple of zip codes away, I get it. I understand. I’ve been there, too. But for now, take a deep breath and try your best to calm those nerves! Moving your business might seem daunting, but it is possible and may actually prove to be profitable in the long run. Today, I am going to show you how to successfully relocate your wedding photography business!

Update All Marketing to Reflect Your New Area

The first step you need to take is to update your online marketing. Obviously, your website copy will need to reflect your new target market area. You'll also want to update your Google Business listing, Facebook, and other social media and advertising platforms to show that you're a wedding photographer in whichever city to which you've moved.

Refine your SEO and Online Presence

This is a whole topic unto itself, but SEO will be your best friend as you begin shifting gears into your new market. If you don't know anything about current SEO trends, begin learning as much as you possibly can. Work on your on-page SEO by optimizing your page titles and image tags. And of course, start blogging with relevant content about your move to your new location. You might not have sessions or weddings in your new city, but you can certainly share your personal experiences as you move! What a great opportunity to connect with your readers on a relatable level! 

When it comes to off-page SEO, I highly recommend hiring someone reputable to optimize your local citations to match your new city. There are hundreds of places online that list your business, and you don't want to leave these untouched. These listings all need to reflect your new market, as well.  

One of your biggest allies will be all of the reviews you've collected while in business! I'm talking about Wedding Wire, The Knot, Google Business – all of these and more. These carry with you no matter where you go! If you haven't reached out to past couples to ask for reviews, do so NOW. Don't be afraid! Let them know that you are relocating and that their reviews are a huge part of the success of your business in your new area.

Relocate Your Wedding Photography Business, Emily Chappell - Dallas Wedding Photographer

Join Local Wedding Photographer and Wedding Industry Groups

When we were in the early stages of moving, one of the first things I did was join a few local Dallas photography and wedding industry Facebook groups. This played a vital role in my success as a Dallas wedding photographer. Making a point to get connected allows you to get to know other photographers and vendors, and learn “who's who” in your new market. This also gives you the opportunity to learn what the wedding market is like before you dive in. And on a personal note, many wedding industry communities host meet ups, which help to build a sense of community so that you won't feel quite as lonely! 

One disclaimer – don't feel discouraged if you are denied access to local groups before you actually move. Oftentimes, admins and moderators won't yet approve your request as a measure to maintain the integrity of a local industry group. This is normal, so just try to be patient.

Research and Study The Wedding Market

Moving from South Carolina to Texas, I noticed that the wedding photography market was vastly different, but I let that inform me rather than simply discourage me. Be prepared that your target demographic in your new city may look different than that in your former city. Geographic changes reflect different styles and trends, and while you will want to stay true to your artistic style, you will need to understand what consumers are buying in your new market.  

With this in mind, start learning about the top photographers in your new city. Study what they are doing and discover what makes them successful, but use that knowledge as a tool to decide how you can then stand out on your own.   

Second Shoot for Other Wedding Photographers

For a couple of reasons, I spent a lot of time second shooting during my first year in Texas. For one, we definitely needed the money, but even more importantly I wanted to connect with the most popular and successful photographers in Dallas. I knew that I could learn so much by working for and observing well-respected Dallas wedding photographers and took any opportunity I could to second shoot for them.  

The great thing about second shooting is that you're able to pick up some new tricks and techniques through observation, but you also have the opportunity to impress that more established photographer by giving them your all. This gives you the potential to earn their trust, friendship, and possibly their referrals for dates they might be booked!

If you are cleared to do so, you can also blog the images you take from weddings you second shoot. Make absolutely sure that the lead photographer is okay with this, as you definitely don't want to burn any bridges.

Relocate Your Wedding Photography Business, Emily Chappell - Dallas Wedding Photographer

Network With Local Wedding Industry Vendors

A great way to start getting your name out there is to begin following local industry vendors. Connect with venues, florists, bakers, dress shops, and planners. Comment on their Instagram feeds, blog posts, Facebook business page updates, etc. – but make sure your comments are natural and organic. No one likes spammy comments that have nothing to do with the content!

Find and attend local industry mixers such as grand openings and open houses. You can usually find these through Facebook groups and business pages. Also, don't be afraid to hit the concrete and introduce yourself to other businesses such as venues, bakeries, and dress shops! 

Strategize “Out Of The Box” Marketing Solutions

Your most successful business plans might be the craziest, most creative ideas! Come up with fresh and unique ways to connect with your community and market yourself to potential couples. Here are a few ideas to get you started:

• Contact local planners and offer to do complimentary headshots. Planners will love that you are contacting them from a perspective of what you can do for them rather than the other way around! In addition to serving them and initiating a relationship, you could also blog about the headshot session and ask if you could interview  that planner for your blog!

• Organize a styled wedding shoot. I actually prefer to call these “networking shoots”! Styled shoots are a great way to connect with local vendors while adding to your portfolio. You can also submit the final shoot to wedding blogs so that everyone benefits from SEO building!

• Host a giveaway. In each market I've worked in, I hosted a giveaway as a marketing strategy. In South Carolina, I gave away two engagement sessions. In Texas, I pulled out all the stops and gave away an entire wedding package. In both instances, I was able to attract buzz around my business and booked five or more weddings as a result. The key to making this work is to create entry guidelines, promote as much as possible, and establish a way to collect names and emails so that you can follow up with those who enter. I can't stress the last part enough – following up is absolutely crucial!

Become an expert at creative marketing strategies that no one else is attempting. This way, you'll set yourself apart from other wedding photographers in your area in no time!

Relocate Your Wedding Photography Business, Emily Chappell - Dallas Wedding Photographer

Take It Easy On Yourself

It can be easy to look at the move ahead and become frozen and overwhelmed with fear. However, I want to encourage you to try your best to shift your perspective and look at your relocation as an opportunity to start fresh. Challenge yourself to try new marketing strategies, or maybe even consider a rebrand. Lastly, and most importantly, give yourself grace as well as the room to make mistakes. Don't beat yourself up if it takes longer to build your business than you originally expected. This could be the perfect opportunity to take a break in the midst of the stress that comes with moving.

So, deep breath. Slow down. You're going to be okay, and you're going to rock it as your city's newest wedding photographer!

Filed Under: Guest Post, Home Middle Left, Photography, Weddings

12 Keywords You Should Be Using On Your Blog

March 24, 2017 by ShooDotEdit

12 Keywords To Use For Web Traffic In Your Blog

As a wedding photographer, your blog is a perfect tool to attract ideal clients to your photography business. When you incorporate keywords into your blog posts, you increase the chances your content will be placed in front of couples looking for a photographer. Wedding photo editing company ShootDotEdit publishes plenty of blog posts each year and understands the importance of featuring keywords in each post. Today, they have a few keywords to share, which you should use on your blog.

When you add keywords to your blog and images correctly with SEO techniques, it can rank as one of the top posts on search engines. These keywords can be featured in your blog posts (your images, title, and Yoast SEO). Including keywords into your blog that are specific gives you a larger chance of reaching ideal clients. How do you know which keywords will work for you? Here are 12 keywords you should be using in your blog to place your posts in front of your ideal clients.

The Specifics

In your blog posts, include keywords to share your specific specialty with searching couples. A couple who lives in New York City, and want to get married at Central Park, are more likely to enter keywords into search engines that relate to the specific location. A bride and groom who live in Northern California and desire to have an outdoor wedding will most likely search for keywords relating to the specific location. Use keywords, such as:

1. Denver Wedding Photographer: This describes a specific location where you shoot the majority of your weddings, so clients know to reach out to you if they are getting married in that location.

2. Destination Photographer: When you shoot destinations, this is a keyword you must use to attract ideal clients to your blog. Since you do not have one location that you shoot all the time, this keyword places you in front of clients who desire a destination wedding.

3. Wedding Photographer in Phoenix: To switch up the keywords you use in your blog posts, and on your images, think of what your ideal clients may type into a search engine. This keyword is likely one your clients will search for when looking for a photographer.

The Locations

As a couple searches for the perfect venue, they also look up locations where they want to get married. Looking online for images of wedding locations can include keywords which gives them an idea of how their wedding photos will look. Use keywords that describe the location where you shot the past wedding you are sharing, such as:

4. Town: Including the town’s name as part of your keywords is helpful for potential couples in the surrounding area, especially if it is a smaller town that may not have many search results on Google.

5. City: Because a city is larger than a town, using this keyword allows you to expand your reach in the location where you shot the wedding images you share.

6. State: When you add the state to the keywords you share in your blog, you continue expand your reach. Since the state is not very specific, be sure to also add in the city or town for your keywords. This helps your clients understand where you like to shoot within the state.

The Venues

Before booking or choosing a photographer, the couple wants to view the venue and envision their wedding day. Add in the venue name, and link out to it, of where you shot the wedding you are sharing in your post. Keywords for the venues could be:

7. Maui, Hawaii Wedding, Haiku Mill: Although couples may not directly search for this hotel and location, placing them together creates a larger chance your post will appear when either the hotel or location are typed into a search engine.

8. Rustic, Indoor Wedding, Union Hill Inn: When a couple knows what type of venue they want to get married at, they are more likely to use keywords that relate to it. If a bride and groom desire this type of wedding, your post (and the featured venue) will appear.

9. Romantic, Outdoor Wedding, Treehouse Point: Outdoor venues are popular for many couples. Adding that into your keywords can help you reach couples interested in this type of wedding photography.

The Descriptions

As clients search for a wedding photographer, they may simply look for the style of the wedding they desire. This is especially true if they are searching for the style before they book the location. Keywords that are description-based can include:

10. Rustic Wedding: For a past wedding on your blog that is the style of a rustic wedding, use this keyword in your blog posts to appeal to ideal clients who desire it for their day.

11. Black Tie Wedding: With this type of wedding, there is an overall mood that represents the shoot. Use this keyword to attract clients interested in this type of wedding photography.

12. Casual Wedding: When a couple knows they want to have a casual wedding, they may use this keyword in search engines. This keyword can help them look at images from a past wedding you shot, and get an idea of what it will look like for their day.

Keywords are a necessary part of your blog and SEO strategy. When your SEO strategy is properly used, your blog posts rank higher on search engines. How else can you optimize SEO for your business through your blog, social media channels, and website? Download our SEO Basics for the Wedding Photographer to find out!

Filed Under: Blogging, Home Middle Right, Photography

  • « Previous Page
  • 1
  • …
  • 7
  • 8
  • 9
  • 10
  • 11
  • …
  • 164
  • Next Page »

Subscribe To Tiffibox Treats!

Looking for a well-curated email newsletter that will leave you inspired and motivated about your photography business? Sign up below!

About Seshu

Seshu creates relaxed portraits of families and high school seniors in Avon, Connecticut. He also leads a successful headshot photography studio in Connecticut, helping professionals from a variety of disciplines project the very best versions of themselves. He created Tiffinbox as a way of inspiring photographers, to create better images and successful businesses. [Read More]

Email Templates For Headshot Photographers

Email Templates for Headshot Photographers

Recent Posts

  • How Capture One Changed My Event Photography
  • 10 Steps To Stay Positive In Times Of Great Stress
  • Why You Need To Read “Personal Branding For Photographers” Now
  • How To Master Your Website Content Step By Step?
  • Tony Taafe’s TNT Method For Headshot Photographers

Recent Comments

  • Stephen Davison on Are You A Business Owner Who Is Smart, But Stuck?
  • Ben A. on Don Giannatti Clinches The 8th Annual Tiffinbox Award
  • Dan on Don Giannatti Clinches The 8th Annual Tiffinbox Award
  • Donald Giannatti on Don Giannatti Clinches The 8th Annual Tiffinbox Award
  • Stephen Davison on G.E. Masana’s 6 Strategies For Wedding Photography Success
  • Naveen Kumar on Weddings In India Are More Than Being At The Right Place And At The Right Time
  • kartick on Weddings In India Are More Than Being At The Right Place And At The Right Time
  • Leonid Farbman on 6 Uncommon Trends To Grow Your Photography Business
  • Willow and Finch Wedding Photography on 11 Reception Tips To Help Your Wedding Photography
  • Web Designer Malaysia on How To Optimize Your Squarespace Website For Search Engines
  • Creastan on An Interview With Photojournalist G.M.B. Akash
  • Cindy Brown | Atlanta on An Open Letter To A Local Photographer

Become a Patron!

Copyright © 2026 · Tiffinbox · Site Design by Heather Mackan Creative · Built on Genesis