• Photography
  • Interviews
  • Business
  • Reviews

Tiffinbox

Inspiring Photographers

  • Home
  • About
  • Blog
  • Contact

3 Ways To Position Yourself As An Expert In Your Field

February 4, 2015 by Cindy Reeves

It’s time to move away from your humble beginnings and start to position yourself as the expert you are. You have the knowledge, the dedication and the vision to be bigger than just a local photographer who takes nice photos.

What exactly is an expert? Experts answer complicated questions with ease. Experts produce inspiring work. Experts are known by name in their industries. Interested? Here are three ways that you can become known as a photography expert.

Option 1: Teach A Photography Class
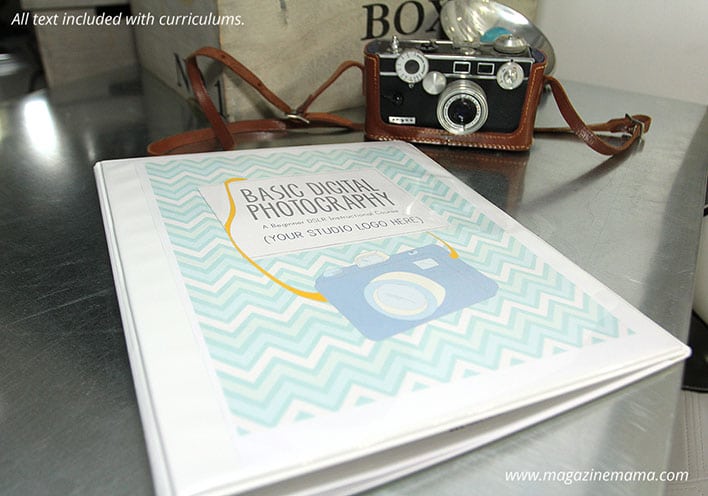
Teach Photograpy Class

You’re probably thinking, “Ugh, teach?” But, yes! You can inspire students and share your knowledge. Take your enthusiasm for photography and spread it to a class of eager and excited students. You teach, they learn and you become the expert. They will ask you questions about what camera is the best on the market and how to use the settings on a DSLR…what is a DSLR?! Questions you most likely already answer, since you are a respected professional photographer.

Don’t reject the idea of teaching due to your objection of writing a curriculum. Teaching a photography class isn’t as big and scary as it may seem. Magazine Mama sells ready-made, pre-written teaching plans for photography classes.

Start with the basics – regardless of students’ age. No one is coming to your class as an expert (that’s your roll)! A common question that beginning photographers who purchase a DSLR camera will have is about manual mode. How do you do shoot on manual and what are the benefits? Photography curricula on Magazine Mama start with these exact topics. Photography basics like understanding exposure, shutter speed, aperture and ISO.
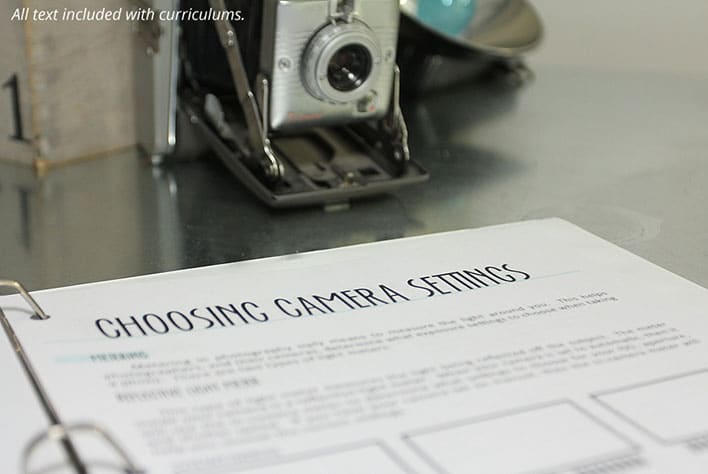
Teach Photograpy Class

The key to teaching kids is to start even smaller. Save technical features like aperture, shutter speed and ISO for later on in the course or at an advanced class. Kids are visual. They want to learn something that they can show someone, like the crayon drawing hanging on the fridge. A good place to start is to show them different shooting modes. It’s simple. This exercise shows kids what each mode is by using a picture:

• head = portrait mode
• mountain = landscape mode
• flower = macro mode
• person running = action mode
• a star in the background = nighttime mode

They choose the mode based on one of the subjects from above. After they get the hang of it, you can add in more modes like M, AV, TV and P.

Starting with the basics will never let you down. Build a solid foundation first and then add more complex topics later. Tailor your curriculum to the intended audience. Kids, adults and moms all have custom teaching plans at Magazine Mama. The hard work is done for you. Add your logo and press print. Curricula come in editable .psd formats. Instructions are included.

Option 2: Custom Magazine With Client Articles
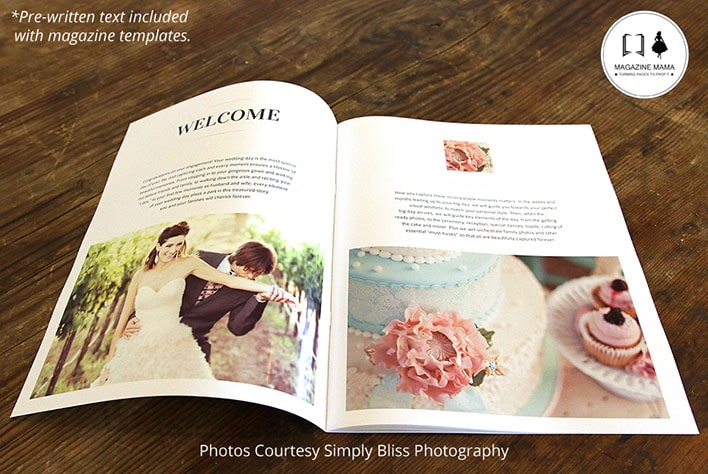
Weddings Welcome Guide Template

Content in a custom magazine shows your clients your expertise. They accomplish two of the three things experts do: inspire and educate. Lead with inspiration for others. Fill the magazine template with your best work. The work that even you admitted was amazing. These are the photos that will inspire others to take action and distinguish you as an expert.

Marry your artsy self with a client focused business model. Go ahead and let your artistic voice shine in your studio welcome guide alongside your professional client-focused business persona. As we discussed earlier, to be known for something is to share expert knowledge. Show potential clients that you have the experience, eye and knowledge to do the job well and that they don’t need anyone else.

Clients read blogs and pin hundreds of photos to Pinterest before they make final decisions. Whoever they get this information from – they will see as the expert. Give them all of this information in a sleek, creative and informative welcome guide and be THE expert.
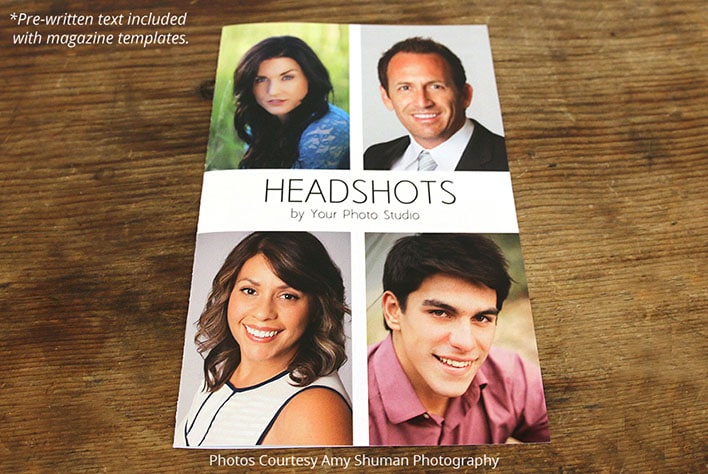
Headshots Welcome Guide

Sharing knowledge helps you help them help you. Magazine Mama has customizable magazine templates with pre-written articles. Topics like “what to wear”, “professional headshots and your business”, and “tips to rock your senior session” are included. These topics help you:

* Answer frequently asked questions
* Educate clients with answers to questions they didn’t know to ask
* Inspire clients to help you take epic photos

Option 3: Go Get Published

Don’t hide your work in a dark, cobwebby corner of your website. It should be front and center. If you want to be known in the photography field amongst the other billion photographers – you need to get your name out there.

The best (and easiest) way to get out there – is to get published. Magazines receive a lot of submissions every day from ambitious and talented photographers like you! And because of that – they are picky. Which means not everyone can bask in the warm glow of a magazine spread. What better way to obtain expert status than by having your images published in a highly respected and widely read industry publication? But, expert status isn’t the only reason to pitch your latest photo-shoot to an editor, it will also help you drive traffic to your website and blog and will give you a boost in sales.

Use code tiffinbox10 and get 10% off your order at Magazine Mama [aff]

Filed Under: Business, Featured Post of the Day!, Marketing, Photography Tagged With: digital single lens reflex camera, Expert Answers, Expert Knowledge, Guide Template, Magazine Mama, niches, Photography Classes, Position Yourself, shutter speed, Single-lens Reflex Camera

Why Calibrating Your Camera’s Lenses Is A Must For All Photographers

June 19, 2012 by Wes Kauffman

Wes Kauffman is the President and Lead Technician at Perfect Image Camera, an independent camera repair center located in Lancaster, PA. Perfect Image has been providing professional camera repair service to the amateur, advanced amateur and professional photographic community for over 30 years.

“There are only two guarantees in life, Death and Taxes.” – Ben Franklin

I could not disagree more with the above statement. There are three guaranteed things in life. Death, taxes, and the fact that 90% of the lenses you buy will not focus properly on your camera. As a camera repair technician I am continuously hearing photographers complain about soft images. Either their lenses used to be sharp and now are not, or they just never performed up to their expectations. The truth is they are right, their lenses are not sharp, no matter how expensive, how new, or how well they take care of their lenses. Taking a camera and lens off the shelf, putting them together and getting perfectly sharp images is just not likely.

The reason is simple. Manufacturing relies on producing a high quality product, not a perfect product. Could Canon and Nikon produce perfectly matched cameras and lenses? Yes, but none of us could afford them. So in order to keep cost down they manufacture equipment to fall within “Allowable Tolerances”. In other words if a lens back focuses just a little, or a camera front focuses a tiny bit that is ok, because the amount of time and money it would take to get things perfect is just not worth it.

So, what’s a photographer to do? Thankfully the answer is really quite simple, Micro-Adjust (for the Canon lover), and AF Fine Tune (for all you Nikonians out there). Essentially what the manufacturers have come up with is a software solution. The process goes like this. We take a camera and lens that are having front or back focus issues, test them on an AF adjustment tool, enter the correct adjustment into the camera and voila we have a camera and lens combo that focus correctly. Now in real life it takes a little more work than that, but you get the idea. In my opinion the most practical and well thought out feature in newer DSLR’s is the AF Calibration feature. Very few technical advances have had such a profound impact on image quality as this one tool.

Perfect Image Lens Calibration

Now I’m going to be honest with you. Calibrating your camera is something you can do yourself, some of my customers do, and some of my customers try. The truth is a qualified repair tech can do it faster, and probably more accurately. They will have the correct tools and more importantly the experience. You also need to keep in mind that not all camera models have the AF Calibration feature built in. Here is a list of current cameras that can be calibrated.

Canon and Nikon

Nikon and Canon DSLR Bodies That Can Be Cleaned at Perfect Image Camera, Inc.

Sometimes calibration is not the answer to focus issues you might be having. Often times, (especially in Canon lenses) the USM (ultrasonic motor) unit in the lenses can go bad. If you have a Canon USM lens and the focus “seeks” (goes in and out without locking focus), or is very erratic (i.e. will back focus one moment and front focus the next) you need a repair not just a calibration. Nikon lenses don’t have the problem as frequently, but it still does occur. I always check a lens for these problems before I even begin the calibration process. If your lens does need repair please keep in mind that once the repair is complete it should still be calibrated with your camera.

Perfect Image Lens Calibration

So to wrap things up, your images are soft, guaranteed! Well 90% guaranteed anyway. Thankfully there is a solution and I can help you with it. Check out my website www.perfectimagerepair.com or click here to order your calibration service today.

Perfect Image is committed to being the solution to all your camera repair or professional sensor cleaning needs. Use the following code: “tiffinbox” and receive a $5 discount off of calibration or sensor cleaning from Perfect Image Camera.

Filed Under: Photo Gear, Photo Technology Tagged With: calibrate, camera, camera and lens, digital photography, digital single lens reflex camera, image lens, images cameras, lenses, nikon, optics, perfect image, photographic lens, Photography, sharp images, technology, usm lens

Photography Concentrate Offers Special Black Friday Deals For Photographers, Ends Nov. 29

November 24, 2011 by Seshu | Editor & Publisher

In the US, you are all just about ready to sit down and have a good meal with your family and friends. Here's wishing you a very Happy Thanksgiving, from my family to yours.

What comes next is usually considered the biggest SALE day of the year, or Black Friday. I haven't done that 2 am mall run in ages and have no desire to send you looking for stuff at such a witching hour either. Life isn't a scavenger hunt. Instead of buying “stuff” that will collect dust in no time, how about giving your brain a boost and learning some new techniques or getting your photography fundamentals down?

Photography Black Friday Sale

Full disclosure: Rob & Lauren of Photography Concentrate are friends. I love their products, I have used them myself and have learned a tremendous amount from them. Yes, even professionals need to keep learning. All the time. So the links you will find here are all affiliate links.

essential_camera_skills If you are just beginning to use your digital camera, consider buying Extremely Essential Camera Skills. Regularly priced at $49.95, if you buy it before November 29 (midnight), you'll save $19.98. I reviewed this gem of an ebook (comes with videos to explain a few necessary fundamental things about your camera) and everybody who has bought it through my affiliate link has thanked me later. With a whole lot of you buying cameras – be they point & shoot or DSLRs, you'll want to get this truly foundational course to get you going.

Once you have your photography skills down pat, you'll need help with editing them. The team at Photography Concentrate have a tutorial called Super Photo Editing Skills. It too is on sale. Instead of paying $79.95, you can buy it for $47.97, saving you $31.98. If you ever wanted to learn how to use Lightroom, this is a great video tutorial. What's awesome is that you can pause it, rewind and watch it again and again until the concepts and the steps make sense to you.

photo editing tutorial album design tutorialWhen you are done editing your images, you have a couple of choices. You can save them on hard drives or you can share them with the world. Albums are always a good choice because they have staying power. Awesome Album Design Skills, is another tutorial that Rob and Lauren have produced for portrait and wedding photographers. They show us how they use InDesign to quickly and efficiently create custom albums for their clients. This too will be selling for $47.97 through the end of November 29th, so you'll want to jump on this deal if you are ready to go pro. It's regularly priced at $79.95.

In addition to the sale, Photography Concentrate has a new free eBook – The Camera Buying Guide (do they just think of everything?) and giving away a Fuji Instax camera (brings you back in time to your Polaroid days doesn't it?).

Please remember that the sale starts NOW and ends on November 29th at midnight EST. If you do buy these products, please come back here and let me know what you thought about them. Your feedback is valued greatly.

Filed Under: Design & Illustration, Photography, Photography Workflow Tagged With: adobe photoshop lightroom, buy camera, camera, concentrate, digital camera, digital cameras, digital photography, digital single lens reflex camera, photographer, Photographers, Photography, photography skill, sale, special deals

You Got Extremely Essential Camera Skills?

August 22, 2011 by Seshu | Editor & Publisher

Right around the holidays last year, just about everyone I know bought or received a camera. No, these weren't the point & shoot variety (hey we have our iPhones for that right?). These were DSLR‘s or digital SLR's. The excitement over opening the camera was palpable. I know because I received several emails soon after asking me … “So, I got a DSLR, but my images still suck. Why?”

My first response was always, “did you read the manual?” The silence at the other end was quite telling. Most of us, I know fail to read our manuals. When I bought my first Nikon DSLR, which I believe was the D70, I don't remember diving into the manual either. On the one side, there is a new toy to play with and on the other, my ego was saying to me: “Yeah, I can figure this out. No problem.” That's until I started seeing images I'd be ashamed to show my mom.

Essential Camera Skills TutorialSo, if the manual is way too daunting, or even boring, what do you do? Until today, you could have scoured the interwebs and patched together a bunch of the info that may have helped elevate your game. That too is time consuming and unless you are nuts about photography or pursuing as a professional, chances are slim you would be inclined to curate that information, digest it and then deploy it on your next go around with your DSLR.
Rob & Lauren Lim, the duo behind Photography Concentrate, have just published Extremely Essential Camera Skills. I was one of the few lucky ones to receive a review copy gratis. Having seen some of their earlier tutorials – Photo Editing Skills and Album Design Skills, I knew this one was going to be special.

Think of Extremely Essential Camera Skills as the foundational course you forgot to take when you started experimenting with your camera. It's exquisitely designed – consistent with their other tutorials and extremely engaging website (which you must bookmark). When you open up the PDF, you are presented with a set of colorful tabs for the different chapters such as: The Camera, Focusing, Exposure, Lenses, Depth of Field and Camera Settings. I found the built-in navigation to be very helpful as it makes it easy to skip pages or navigate back to the ones you want to read again.

Extremely Essential Camera Skills Navigation

Unlike other tutorials that teach but fail to train, what I loved about Rob & Lauren's latest offering is that they are serious about making sure you get the concepts they have just taught before moving on to the next chapter. They do this through tips, exercises, videos (more on this in a bit) and pop quizzes. Though it is incredibly thorough, Extremely Essential Camera Skills is not a read it and forget it kind of manual. The lessons you will learn, each one at your own pace, will stick with you for a lifetime. The definitions and demonstrations are easy to understand and absorb.

As a professional, most of the concepts were familiar to me. But that's only because I use my camera every day, so it does become intuitive. Having a guide like Extremely Essential Camera Skills will help you get to that point where you too can easily make images you are proud to show your family and friends.

If there was one area where I could see the authors develop more content, it's the section on using an alternative to that pesky flash that everyone insists on deploying. To their credit they do say this: “The built-in flash on cameras generally sucks.” So true. May we see a sequel to this guide that will dwell on off-camera flash? I hope so, but I do believe this guide will lay the foundation for better images using flash. So, I do urge you to get this one first.

Extremely Essential Camera Skills Videos

The 7 videos by Lauren are fantastic. Her even, conversational tone and excellent examples helped me better understand the concept behind exposure compensation. So, the take aways are many. With Rob & Lauren's permission, I am considering using this guide book for photographers (I really don't want to call it a manual) in the beginning photography class I teach high schoolers. Yes, it's that good and it is perfectly fitted to meet the demands of amateurs and semi-professionals too.

As I have already stated, I received a review copy Extremely Essential Camera Skills and loved it. If you are struggling to use your DSLR, this guide book will help you get comfortable. For the next two weeks starting today, Rob & Lauren are offering a launch sale. You can get Extremely Essential Camera Skills for $29.97, that's 40% off the regular price of $49.99. In addition to the 89-page PDF and videos which you can view on your computer or your iPad, you will receive the Extremely Essential Camera Skills Field Guide, which you can print and tote around while you are photographing.

Full disclosure: As an affiliate, I receive a commission on the sale of this PDF to support Tiffinbox. If you enjoy the content on this site, I ask that you use the links in this post to buy Extremely Essential Camera Skills. Thank you!

Filed Under: Books, Photography, Tutorials Tagged With: camera, camera flashes, camera settings, cameras, digital photography, digital single lens reflex camera, dslr, ebook, essentials, extremely essential camera skills, Flash, guide books, guides, manual, PDF, Photography, photography concentrate, rob & lauren lim, skill, technology, tutorial

3 Simple Techniques To Elevate Your Photography

January 20, 2011 by Trevor Rideout

This is a guest blog post by Trevor Dean Rideout, a lifestyle and family photographer based in central Newfoundland.

So you’ve conquered exposure, you confident in your ability to shoot in manual or priority modes and your getting some great feedback on your photography. What next? Well here are three things to apply to your craft, that don't cost money, you can apply in-camera, and will improve your photography overnight!

These techniques are simple in theory but take time to become second nature. Don't fret and as the saying goes, “practice makes perfect”.

1. Focus On The Eyes

You've probably heard this expression more than once and may be wondering to yourself, “well what does that mean?”. The concept is simple. Set your focus mode to center focus. Most if not all camera's today have the ability to move your focus zone around between those little squares in your camera, but for now let's just focus on the very center. When shooting portraits, it is usually the most ascetically pleasing to shoot with a wider aperture. This helps to separate your subject from the background and gives you nice creamy backdrops. The biggest issue here, is that the result of opening your aperture nice and wide, decreases you “depth of field” (DOF). Wherever you zone in that focus point, is where your subject will be most in focus. To guarantee the best results you need to focus on the eyes. As humans, our first instinct when viewing a photograph is to look at what's in focus, and in portraiture, the most important element is the eyes.

So, have a look through your viewfinder, line up that little square right over the eye that is closest to you and press your shutter half way down. This will lock in that focal area and give you nice sharp results on the eye that you've chosen. Whatever else falls outside of the DOF at this point is irrelevant. Sometimes, you may not be able to frame the scene exactly the way you want it, if you just focus and shoot in the one spot. This is where locking in your focus (half press of the shutter) and then recomposing your shot, comes in to play. As long as you do not move the camera forward and backward, you will stay within your focal plane, and the chosen point will stay in focus. This is absolutely essential when shooting at anything wider than f5.6 but should become common practice whenever your photographing people.

Trevor Rideout

Trevor Rideout - Focus On The Eyes

2. Watch Your Crop!

I see this mistake made probably more than any other when photographing people. If you're not careful about where you frame your subject, you may end up cutting off fingers, toes, limbs, etc. While this is probably something you may have never noticed, it is commonly accepted rule in Art. There are though, what we call “crop points”. The general rule you need to remember, is don't crop at anything that bends. Most commonly you will see fingers cropped at the edges of the frame. Standard crop could include about midway down the bicep, above the waist (midway between the sternum and waistline) and about midway between the waist line and knees. When you crop at other sections of the body it tends to make the subject look amputated and is not considered ascetically pleasing.

Trevor Rideout - Watch Your Crop!

Trevor Rideout - Watch Your Crop!

3. Watch Your Backgrounds

This is also one of those things that you need to become completely aware of when photographing people. It requires what you might refer to as “situational awareness”. When you’re composing your photo you may want to include some of the background to help better portray the story you’re trying to tell. What you need to watch for is objects passing through your main subject. Commonly it would end up being power lines, tree branches and other architectural features; although I have seen some instances that involve much more hilarity. You have to keep in mind that we see in 3 dimensions, but our camera's only have the ability to convert that scene into 2 dimensions. This means that you may see your subject in front of a very compelling backdrop with lots of people and things behind them, but your camera may tell a different story. Deeper in the frame, objects tend to shrink, in relation to your subject. This could mean that although you see a person walking down the street, once compressed, that person could be walking right into your subjects ear (as a less likely, but more comical example). So keep your eyes open and make a habit of scanning the entire viewfinder area. When we're first starting out, we tend to focus on one thing … whatever the main subject we're trying to photograph. Try to make a conscious effort, whenever you’re composing your shot, to take a quick scan around the entire area of the viewfinder. This will also help to better express your vision. Think about what you want to include in the frame and what you don't. Even though our higher resolution sensors allow us to do some pretty heavy cropping in post, it is always better to nail it, in camera, and have the ability to work with the entire resolution of the photo.

Trevor Rideout - Watch Your Background

So there you have it! Three simple techniques that you can apply right now. They don't cost any money, don't require any special software but they will take time to perfect and make second nature. Practice these techniques daily and before you know, you won't even know you're thinking about it!

Since this blog is all about learning and sharing, how about dropping a link to one of your images (use Flickr if you have to) that uses one or possibly all that Trevor has talked about in this post? Don't spam the comment box. One entry per person please. So, what are you waiting for? Let's see some of your images! If you do post anonymously, I reserve the right to delete your comment.

Filed Under: Uncategorized Tagged With: aperture, camera, cameras, depth of field, digital single lens reflex camera, elevate, elevated, optics, Photography, point and shoot camera, science of photography, shutter, techniques, trevor dean, trevor dean rideout, viewfinder

Subscribe To Tiffibox Treats!

Looking for a well-curated email newsletter that will leave you inspired and motivated about your photography business? Sign up below!

About Seshu

Seshu creates relaxed portraits of families and high school seniors in Avon, Connecticut. He also leads a successful headshot photography studio in Connecticut, helping professionals from a variety of disciplines project the very best versions of themselves. He created Tiffinbox as a way of inspiring photographers, to create better images and successful businesses. [Read More]

Email Templates For Headshot Photographers

Email Templates for Headshot Photographers

Recent Posts

  • How Capture One Changed My Event Photography
  • 10 Steps To Stay Positive In Times Of Great Stress
  • Why You Need To Read “Personal Branding For Photographers” Now
  • How To Master Your Website Content Step By Step?
  • Tony Taafe’s TNT Method For Headshot Photographers

Recent Comments

  • Stephen Davison on Are You A Business Owner Who Is Smart, But Stuck?
  • Ben A. on Don Giannatti Clinches The 8th Annual Tiffinbox Award
  • Dan on Don Giannatti Clinches The 8th Annual Tiffinbox Award
  • Donald Giannatti on Don Giannatti Clinches The 8th Annual Tiffinbox Award
  • Stephen Davison on G.E. Masana’s 6 Strategies For Wedding Photography Success
  • Naveen Kumar on Weddings In India Are More Than Being At The Right Place And At The Right Time
  • kartick on Weddings In India Are More Than Being At The Right Place And At The Right Time
  • Leonid Farbman on 6 Uncommon Trends To Grow Your Photography Business
  • Willow and Finch Wedding Photography on 11 Reception Tips To Help Your Wedding Photography
  • Web Designer Malaysia on How To Optimize Your Squarespace Website For Search Engines
  • Creastan on An Interview With Photojournalist G.M.B. Akash
  • Cindy Brown | Atlanta on An Open Letter To A Local Photographer

Become a Patron!

Copyright © 2026 · Tiffinbox · Site Design by Heather Mackan Creative · Built on Genesis